
You are using an out of date browser. It may not display this or other websites correctly.
You should upgrade or use an alternative browser.
You should upgrade or use an alternative browser.
ChaosMotorSport MKII Buggy Engine Swap
- Thread starter ChaosMS
- Start date
ChaosMS
Active member
Yeah im moving all the suspension mounts off the rear frame and onto a new subframe that mounts to the holes in the engine mounts and also to the main chassis via two vertical plates (not done that bit yet)
Just sorting the subframe design out then I can have it cut out and get it welded together, the only mount which will be left on the old rear frame will be the upper shock mount ( I will add a suspension locking option so that you can lock the bottom arms in place undo the top shock mount and remove the rear frame with it still sat on its wheels)
I am thinking of a pin and socket arrangement to put the rear frame back on, I have a neighbor with a lathe and mill (he does model engineering) who has offered to make them for me each joint would have a couple of bolts running through it and either end would be welded into the tube
How were you thinking of doing yours?
ChaosMS
Active member
same process really and I usually build in a way to adjust if i'm not mm perfect, lasers are the way to go that and a big square !!
Got the majority of the lifting frame and bits painted and finished now - will post some pics soon, have also sold the old engine so have a little more space to work, will be splitting the tyres from the rims this weekend so they can go on ebay too!! sell sell sell.... need the new rims or second hand rims for refurb
Got the majority of the lifting frame and bits painted and finished now - will post some pics soon, have also sold the old engine so have a little more space to work, will be splitting the tyres from the rims this weekend so they can go on ebay too!! sell sell sell.... need the new rims or second hand rims for refurb
Bolt flat plate to the block, attach the mount to teh chassis then fill the gap with box? 
I have realised my error in making everything at an angle - nothing much to take a level from!
And in usual fashion of paying other people, my custom bent tubing is far from precise / symmetric
Which is becoming more obvious as I add more stuff. Guess i'll need to paint it zebra colours to break up the lines!!
Anyway - now your selling stuff are you going more road based or is it so you can use the golf hubs/ drive flanges?
I need (want?) some 13x10s for mine
ChaosMS
Active member
I know what you mean Wagon, got some so called super accurate mandrel bends and they were shocking!!! hence I built the Tube Bender!!
As for selling stuff, its so I can use the mk5/r32 5x112 drive flanges and bearings (which have the same spline as my driveshafts) I have also increased the size of the disks and calipers so need bigger wheels with a a different PCD - I am thinking of going with 18" rims
when you say you want 13x10s do you mean 13" diameter by 10" wide ?? they would be massive wide things!!! Awesome Carlos Fandango super wide wheels (showing my age there)
ChaosMS
Active member
well its been far too long a wait for this update!! - I'm turning into a proper slacker ;D
So finished the buggy lift here are a few pics:


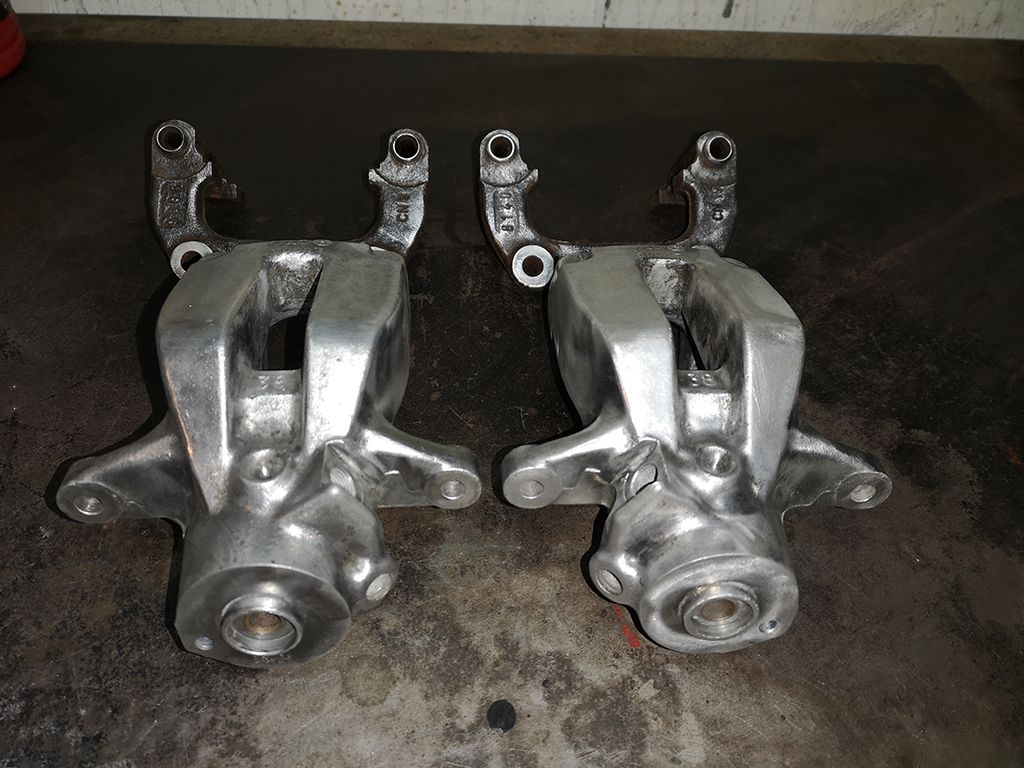
So decided to get the brake calipers sorted as they looked in a hell of a state (especially the back ones) here are a few pics before during and after (though I am still re-building the back ones as I discovered a broken snap ring so having to wait for new ones

rear caliper cleaned and stripped next to one in the state i got them!
Rears all cleaned and the carriers all sorted too
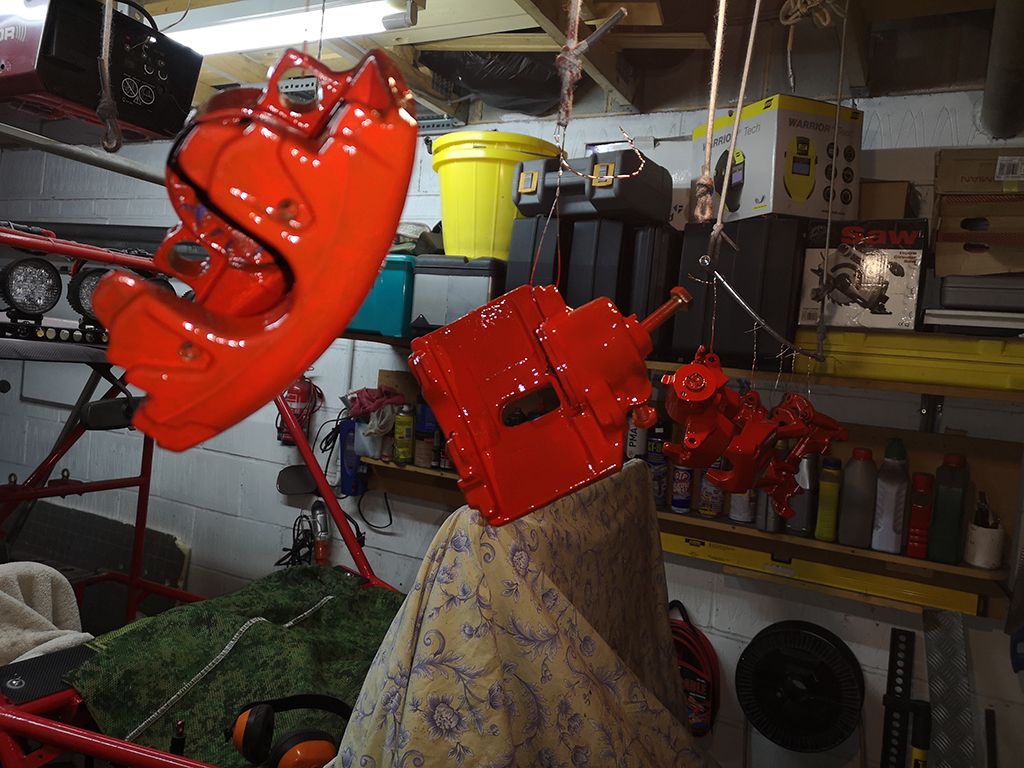
Painting time!

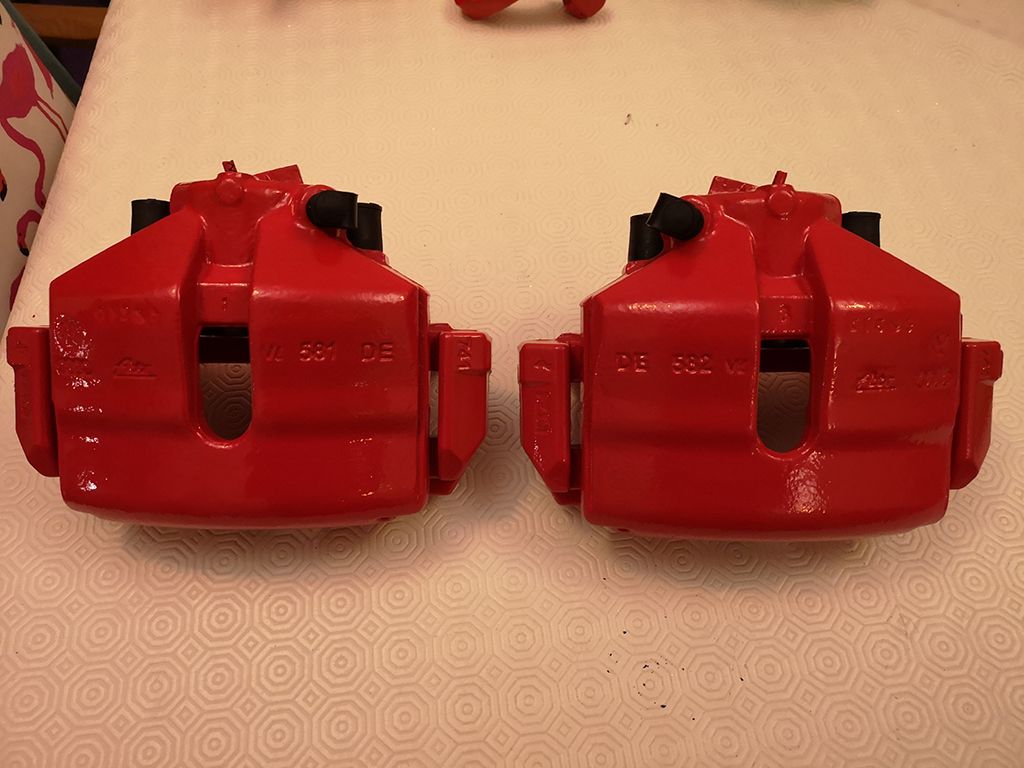
Fronts re-built all new everything pistons / sliders / seals / bleed screws etc
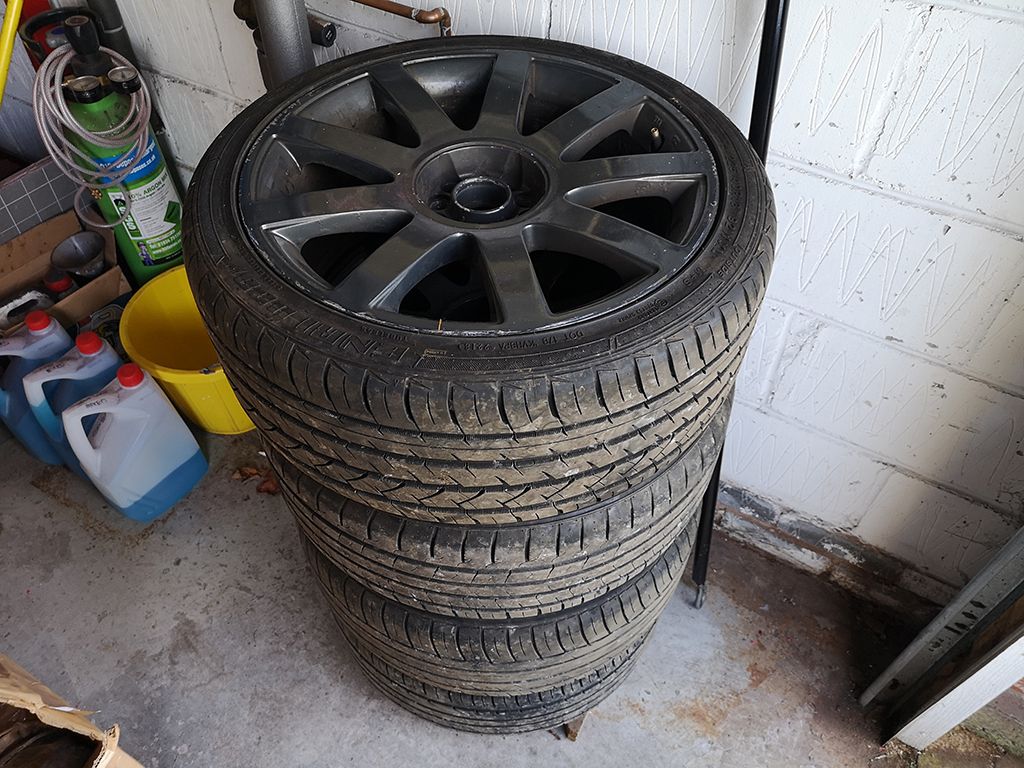
Also managed to locate a set of wheels for the buggy (as Ive sold the old ones due to wrong stud fitment now) they came off an Audi TT - they are a bit worse for wear but I will have them re-furbished and powder coated when im ready
Next job is to finish the rear calipers and pack them away till i need them and finish the subframe design here is the design so far:-

And yeah thats roughly where the backbox is going to go ;D
So finished the buggy lift here are a few pics:
So decided to get the brake calipers sorted as they looked in a hell of a state (especially the back ones) here are a few pics before during and after (though I am still re-building the back ones as I discovered a broken snap ring so having to wait for new ones
rear caliper cleaned and stripped next to one in the state i got them!
Rears all cleaned and the carriers all sorted too
Painting time!
Fronts re-built all new everything pistons / sliders / seals / bleed screws etc
Also managed to locate a set of wheels for the buggy (as Ive sold the old ones due to wrong stud fitment now) they came off an Audi TT - they are a bit worse for wear but I will have them re-furbished and powder coated when im ready
Next job is to finish the rear calipers and pack them away till i need them and finish the subframe design here is the design so far:-
And yeah thats roughly where the backbox is going to go ;D
ChaosMS
Active member
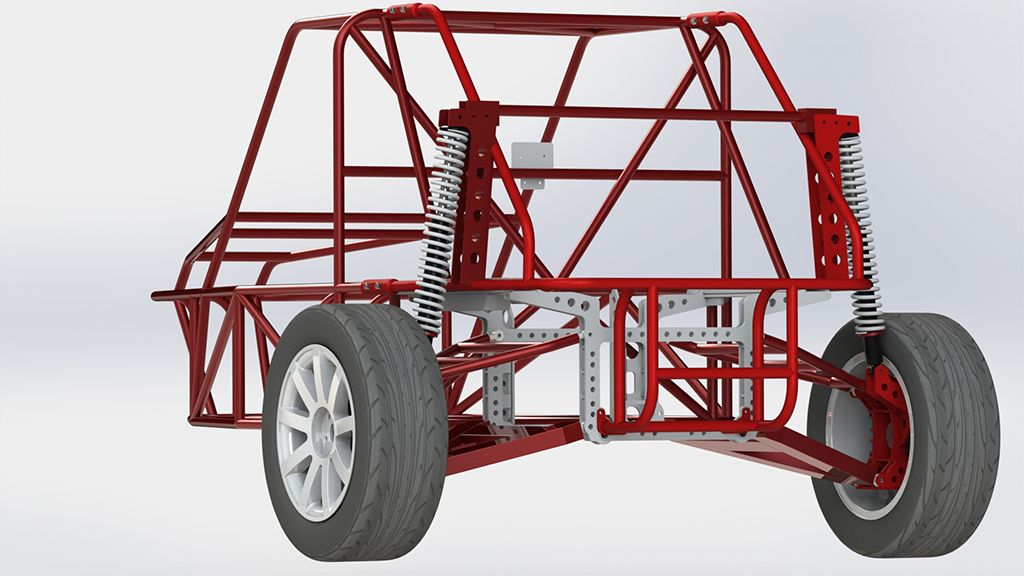
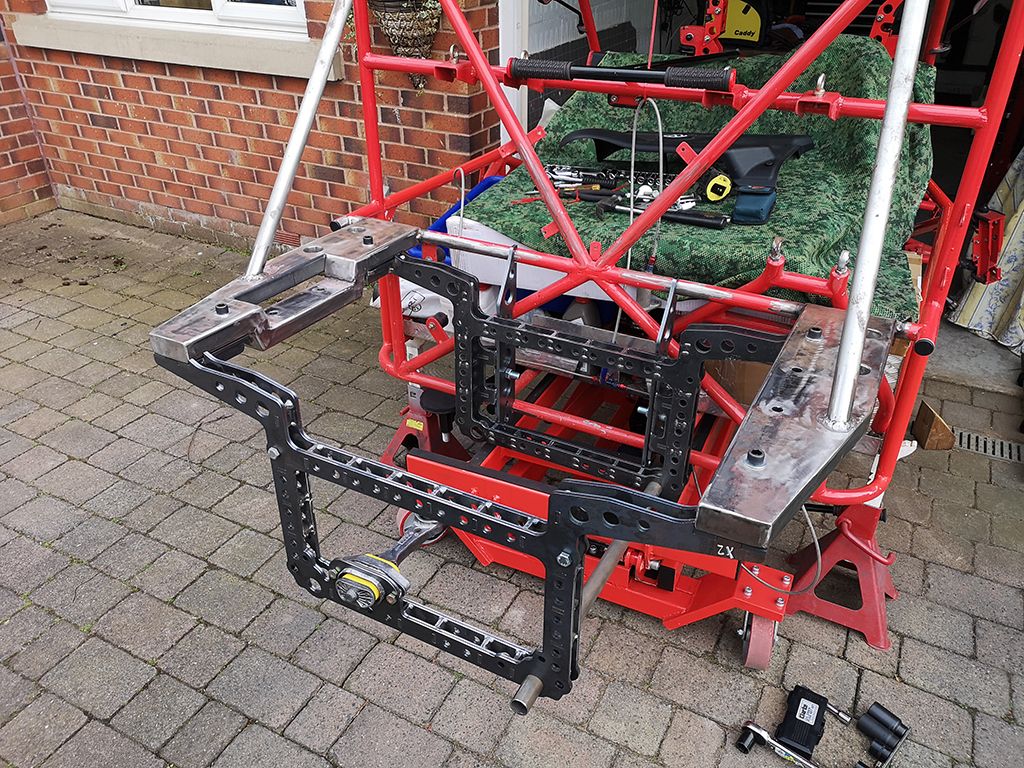
i think i have almost nailed the subframe design now - here it is in the rear of the chassis but with the rear cage off:-

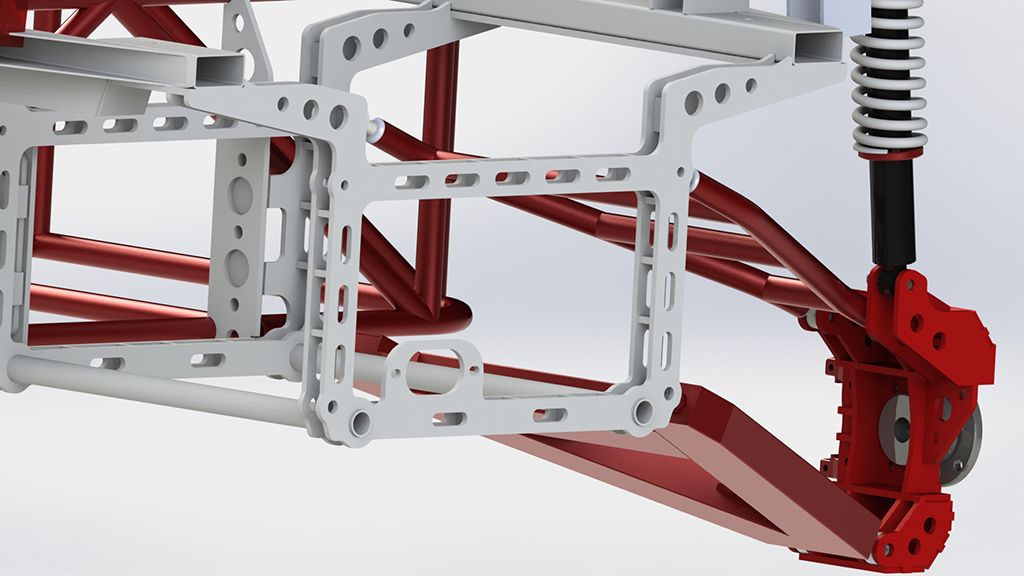
subframe complete without the frame - the oval cutout at the front is for the dog-bone engine stay from the golf.

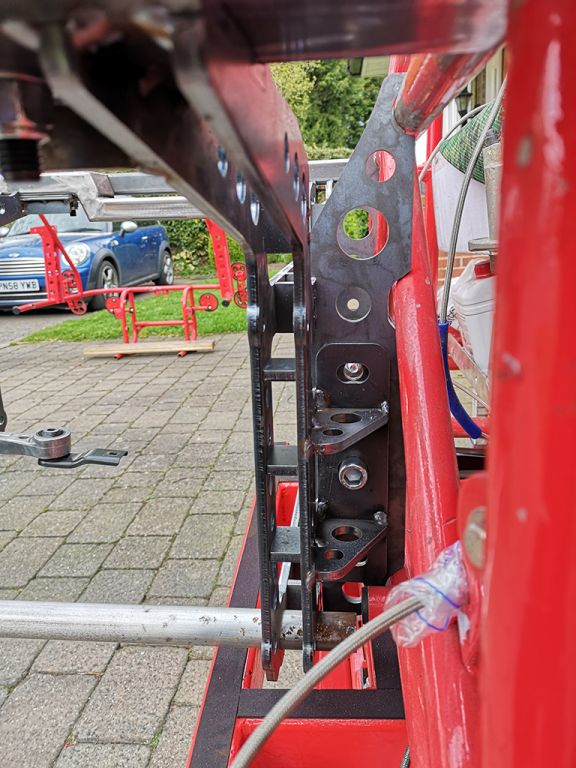
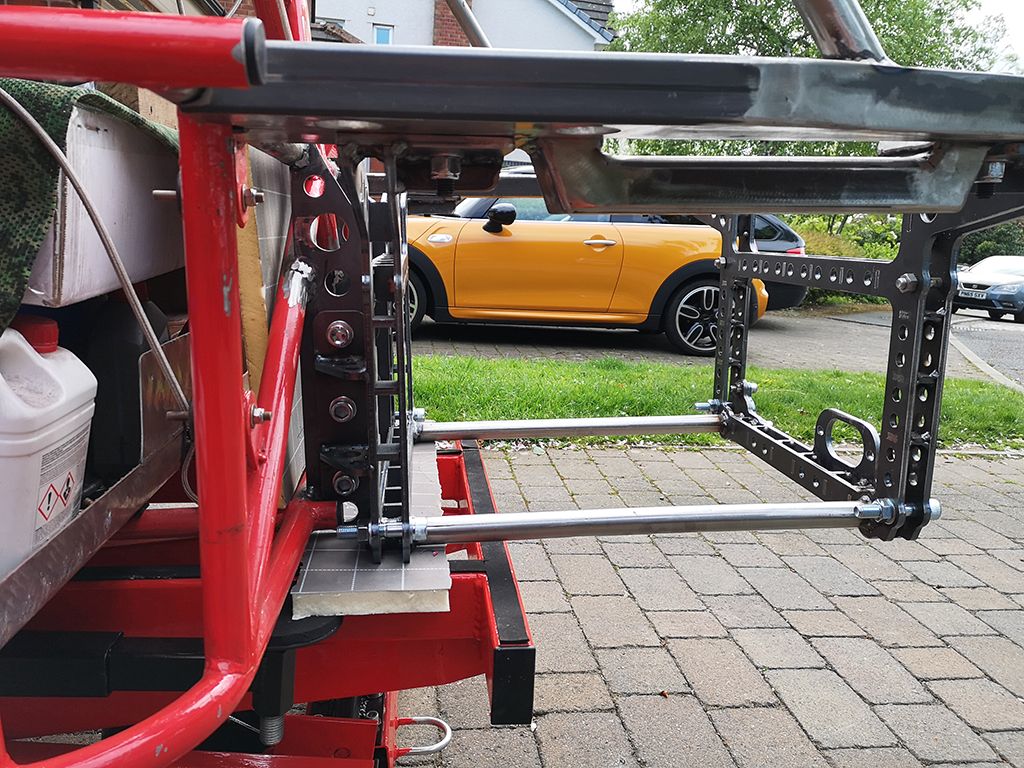
a closer look at the mounting onto the chassis at the rear of the subframe (or the front whichever way you look at it)

just working on the design for the new lower arms that will be using 16mm rose joints instead of the 12mm ones I used before!!
subframe complete without the frame - the oval cutout at the front is for the dog-bone engine stay from the golf.
a closer look at the mounting onto the chassis at the rear of the subframe (or the front whichever way you look at it)
just working on the design for the new lower arms that will be using 16mm rose joints instead of the 12mm ones I used before!!
ChaosMS
Active member
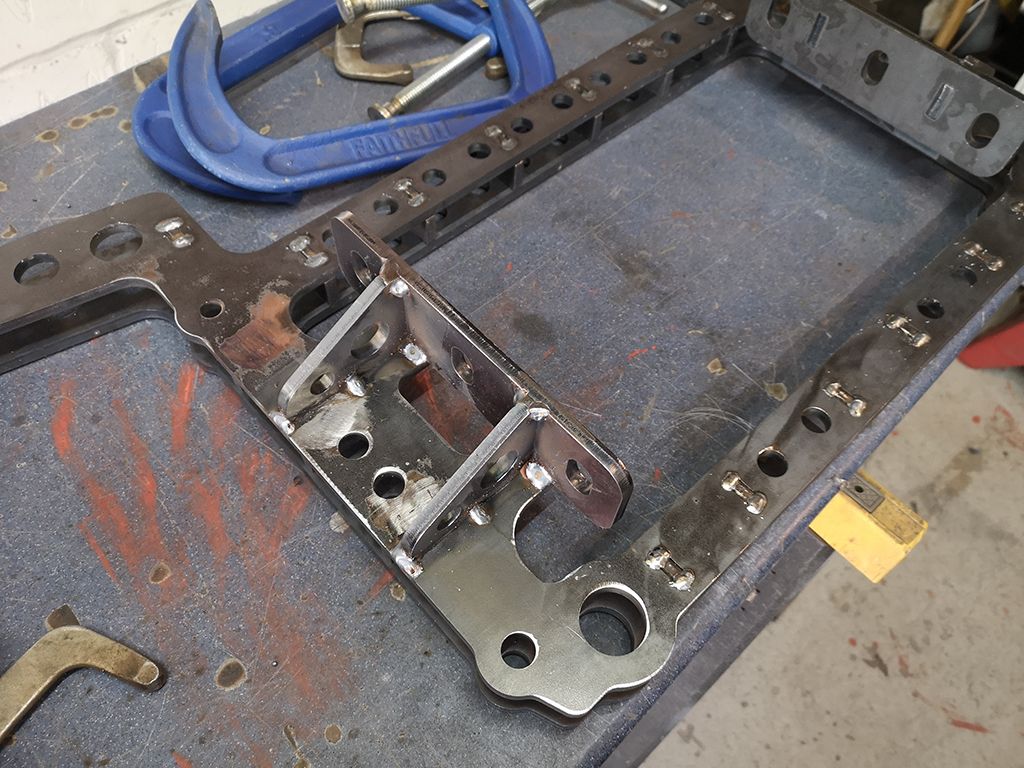
Hi - been busy sorting out the hub carrier over the last few days as had a little space issue!!, anyway I think I have it sorted and possible to build from the "flat plates with lugs attached" method for ensuring it all fits together accurately

With a bit of luck I should be sending the subframe and carrier parts out for laser cutting this week
Rich
With a bit of luck I should be sending the subframe and carrier parts out for laser cutting this week
Rich
ChaosMS
Active member
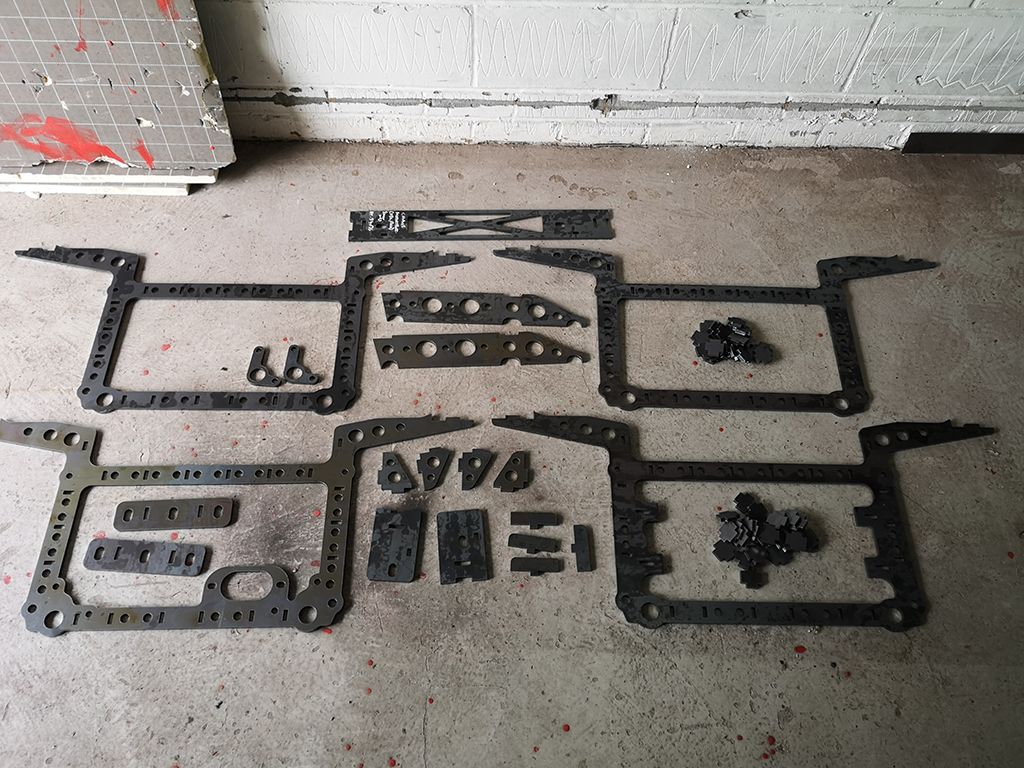
So finished the design for the subframe and hub carriers - so the rendering looks like this for the rear:
I got the guys at AK Stainless to do all the cutting of the parts from that rendering:-

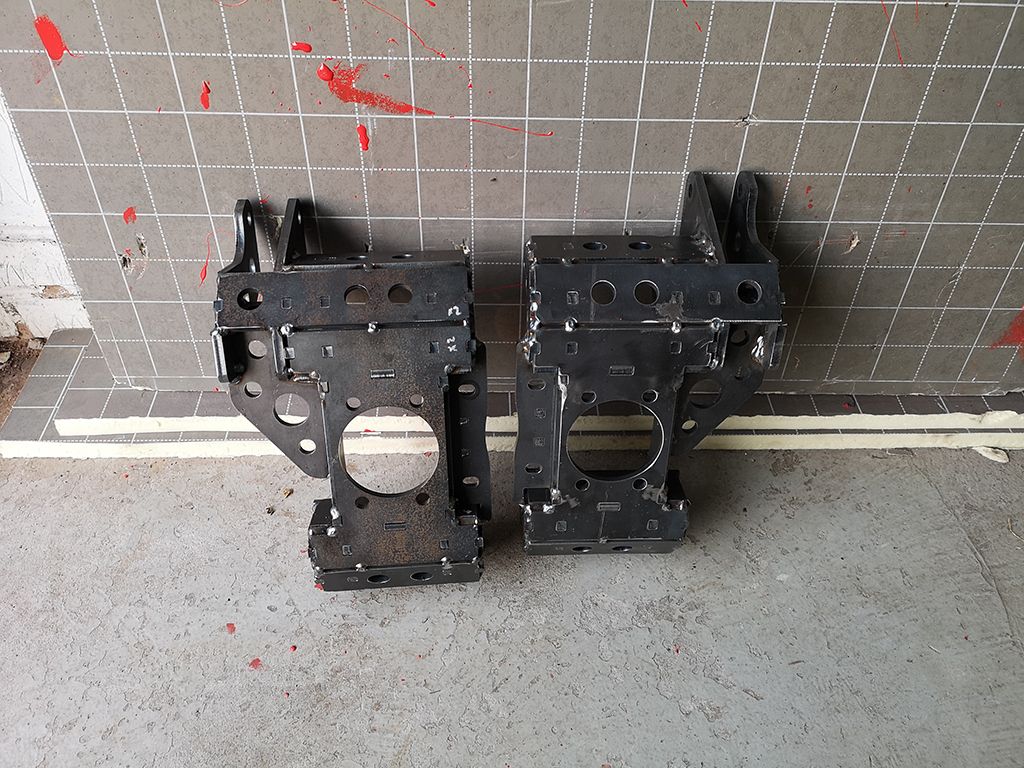
Then set to putting the bits together, got both of the hub carriers tacked together ready for seam welding:-


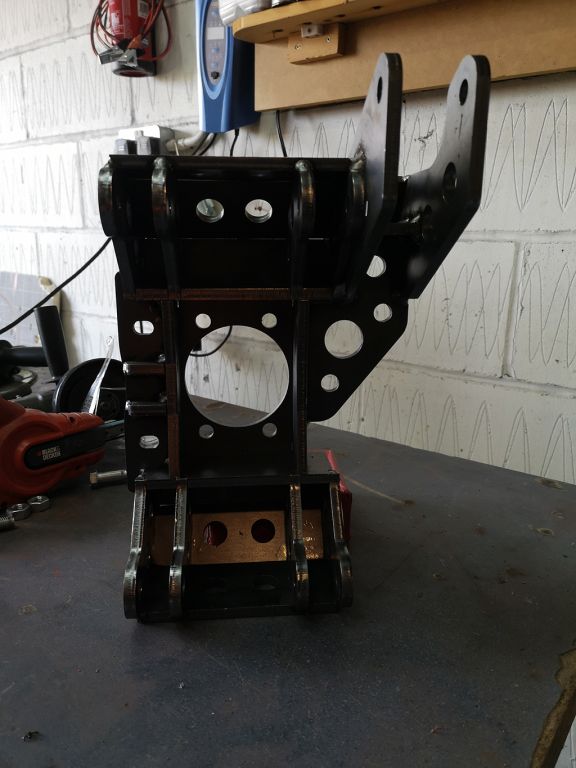
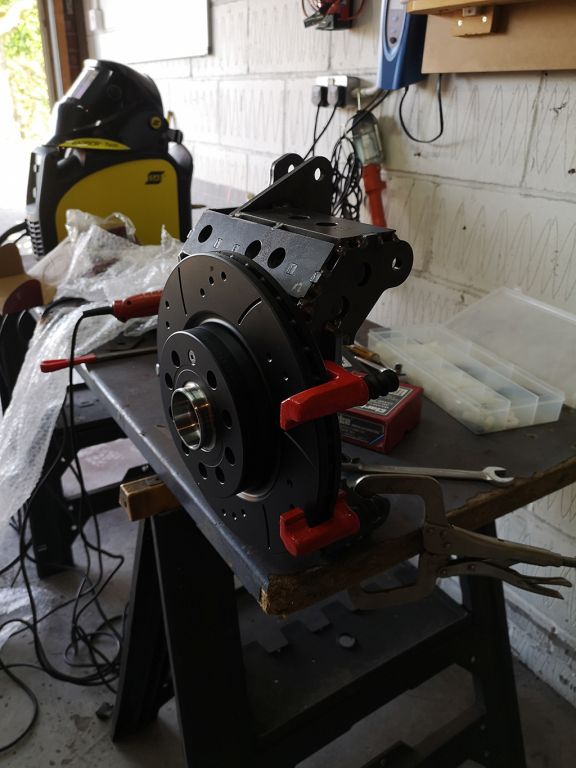
Test fitted the hub disk and caliper frame


And then built the other side
And finally built the first section of the subframe and test fitted it:-
nice to get things moving again - did find the exhaust manifold exited right onto the subframe cross bar but I knew that was going to need work anyway!!
I got the guys at AK Stainless to do all the cutting of the parts from that rendering:-
Then set to putting the bits together, got both of the hub carriers tacked together ready for seam welding:-
Test fitted the hub disk and caliper frame
And then built the other side
And finally built the first section of the subframe and test fitted it:-
nice to get things moving again - did find the exhaust manifold exited right onto the subframe cross bar but I knew that was going to need work anyway!!
ChaosMS
Active member
Cheers mate ;D
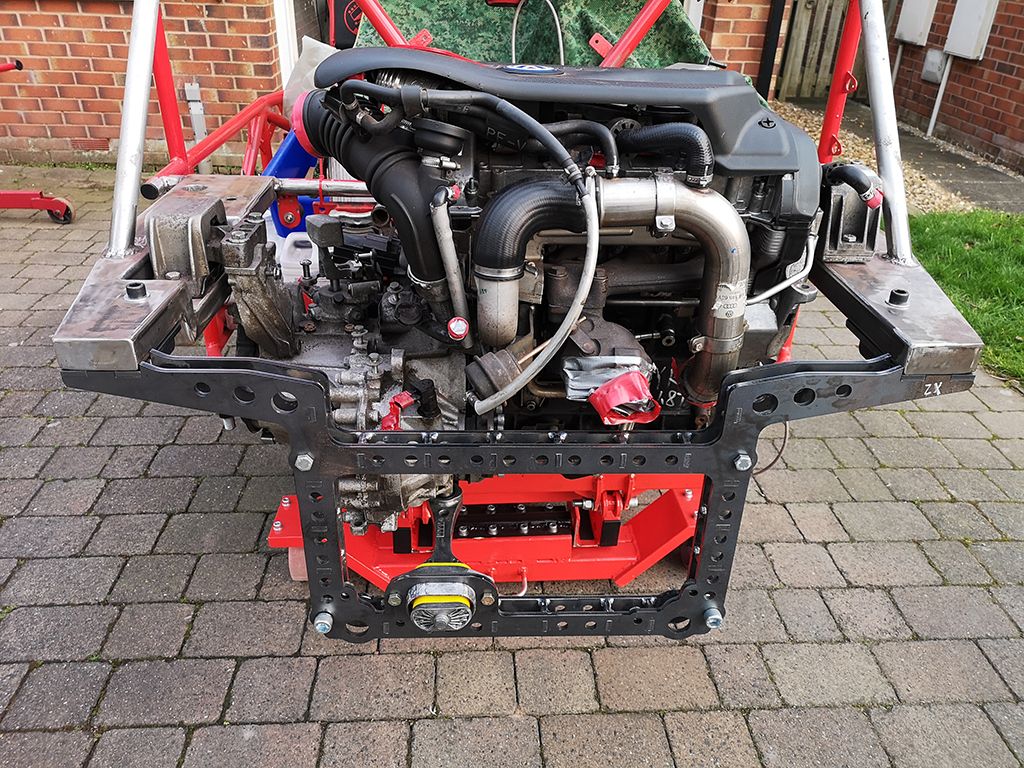
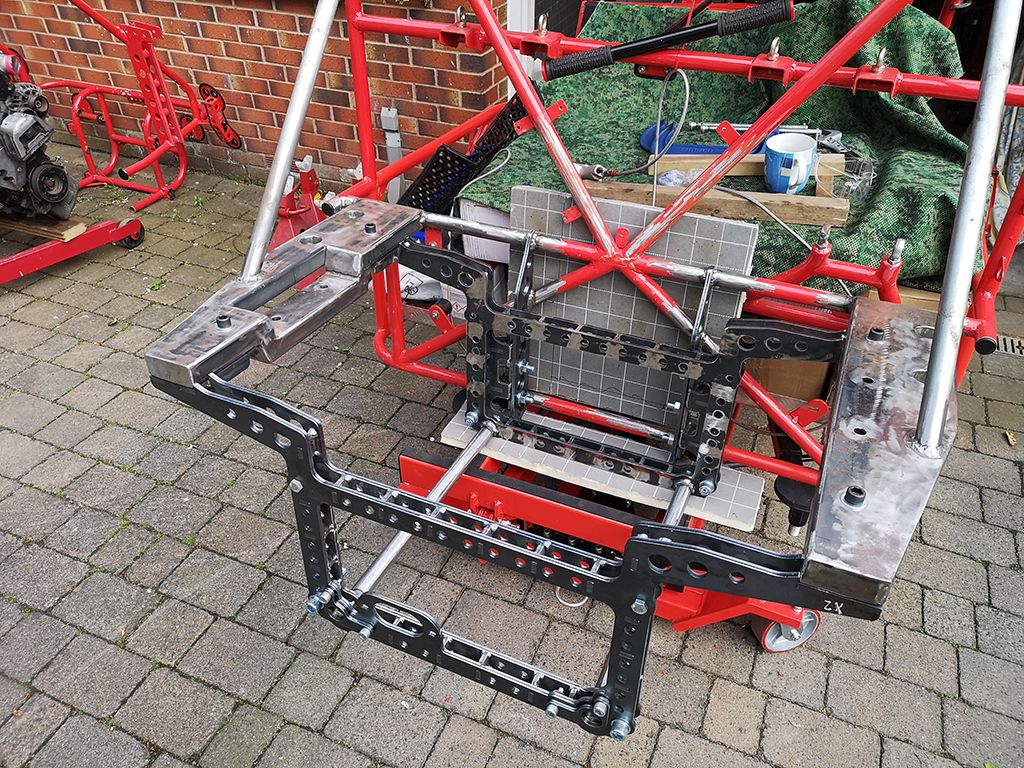
So I've been busy again on Sunday, got the second frame part of the subframe tacked together - this is the chassis end and has the additional mounts to bolt to the frame, here are a few pictures:-


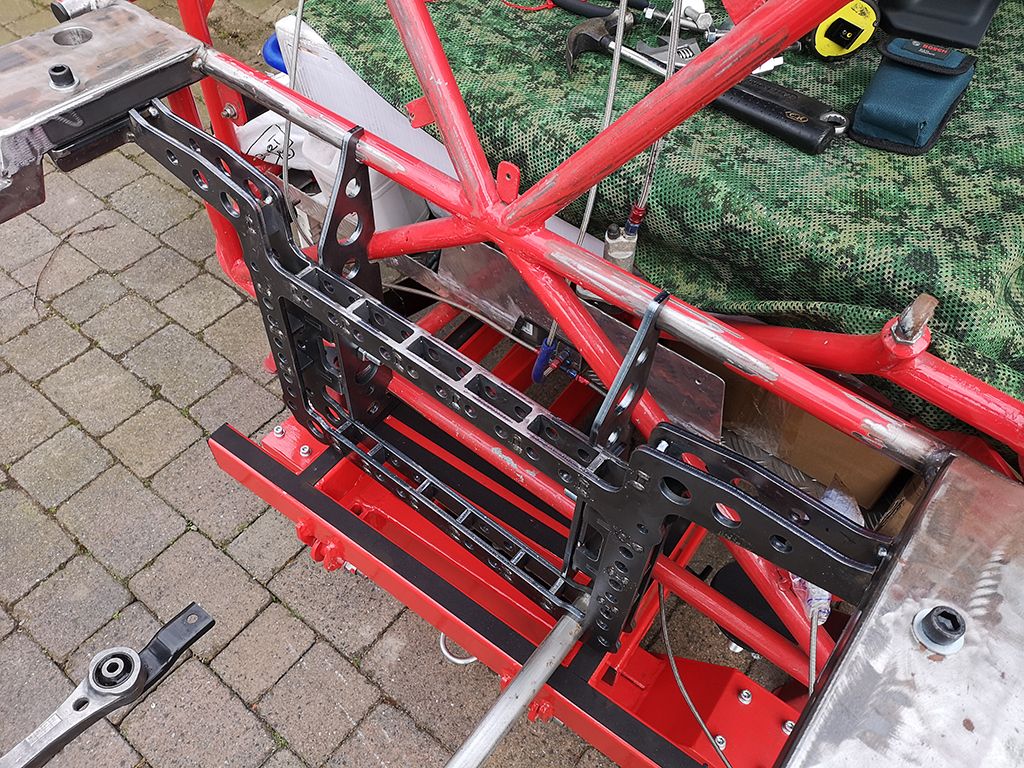
And then I dropped the engine back in and found (as expected) the oil filter hits the frame!! - not an issue as I have a take off sandwich plate for it, so all good everything else fits spot on!!
Next job is to get another gas bottle as I've run out - do the final weld on all parts add the other tube to the bottom of the subframe and weld up - then I am going to sort the lower arms and also look at getting the engine to turn over (just to test compression)
So I've been busy again on Sunday, got the second frame part of the subframe tacked together - this is the chassis end and has the additional mounts to bolt to the frame, here are a few pictures:-
And then I dropped the engine back in and found (as expected) the oil filter hits the frame!! - not an issue as I have a take off sandwich plate for it, so all good everything else fits spot on!!
Next job is to get another gas bottle as I've run out - do the final weld on all parts add the other tube to the bottom of the subframe and weld up - then I am going to sort the lower arms and also look at getting the engine to turn over (just to test compression)
ChaosMS
Active member
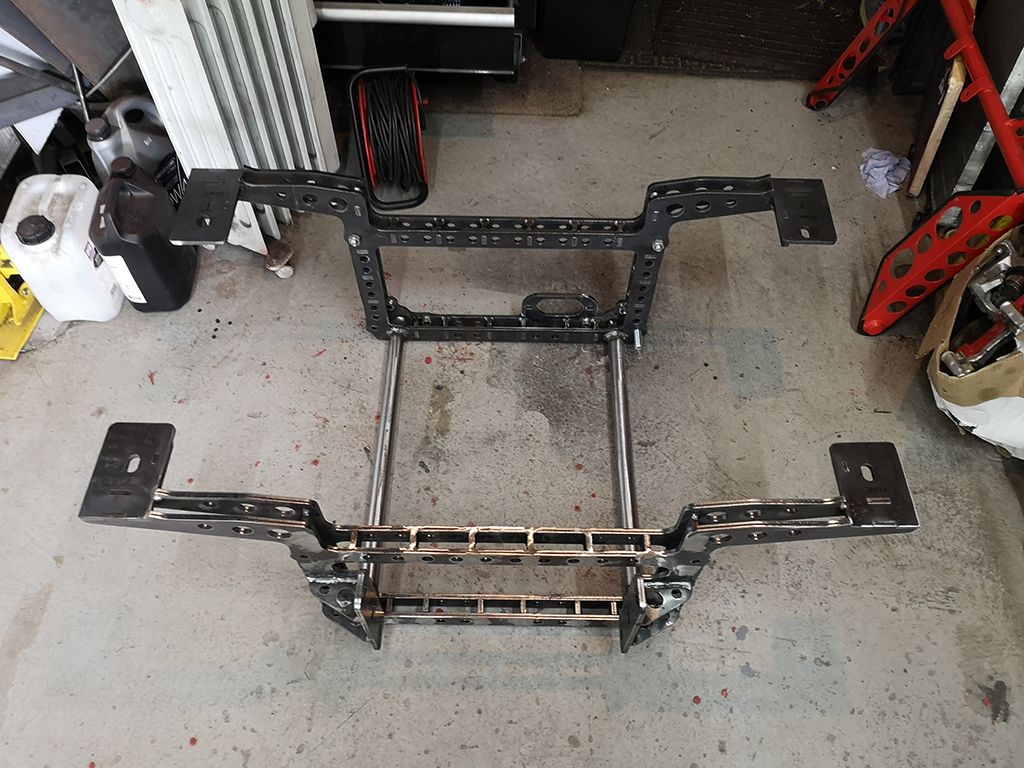
Been busy this weekend, finished off the subframe and got the chassis mounting plates welded in place (Thanks to Steve popping around to help out)
here are a few pics


Steve was enjoying himself so much he finished welding up the rear hub carriers for me too!!
So next stage is build the new lower arms and get them fitted also need to get the chassis pins finished and get the back end back on to make sure everything fits!!
here are a few pics
Steve was enjoying himself so much he finished welding up the rear hub carriers for me too!!
So next stage is build the new lower arms and get them fitted also need to get the chassis pins finished and get the back end back on to make sure everything fits!!
ChaosMS
Active member
Been a busy bee over the last couple of weekends got lots done and Steve came over so much amusement was had by all! (Though this time he didnt use me as an earth strap for the TIG!!)
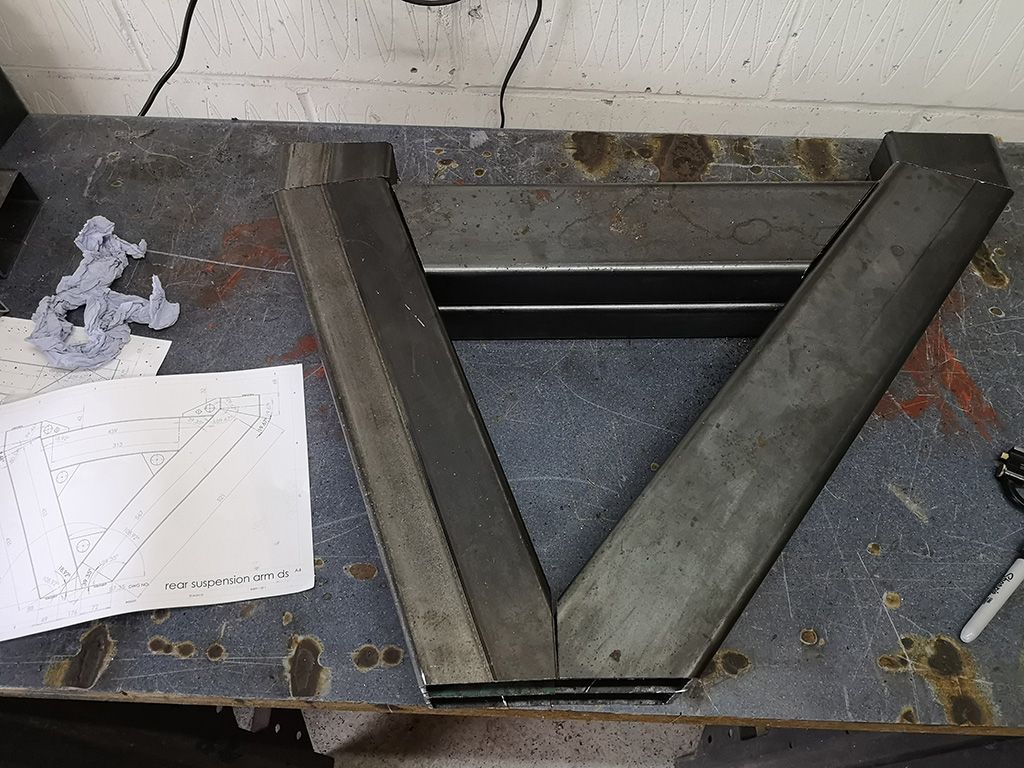
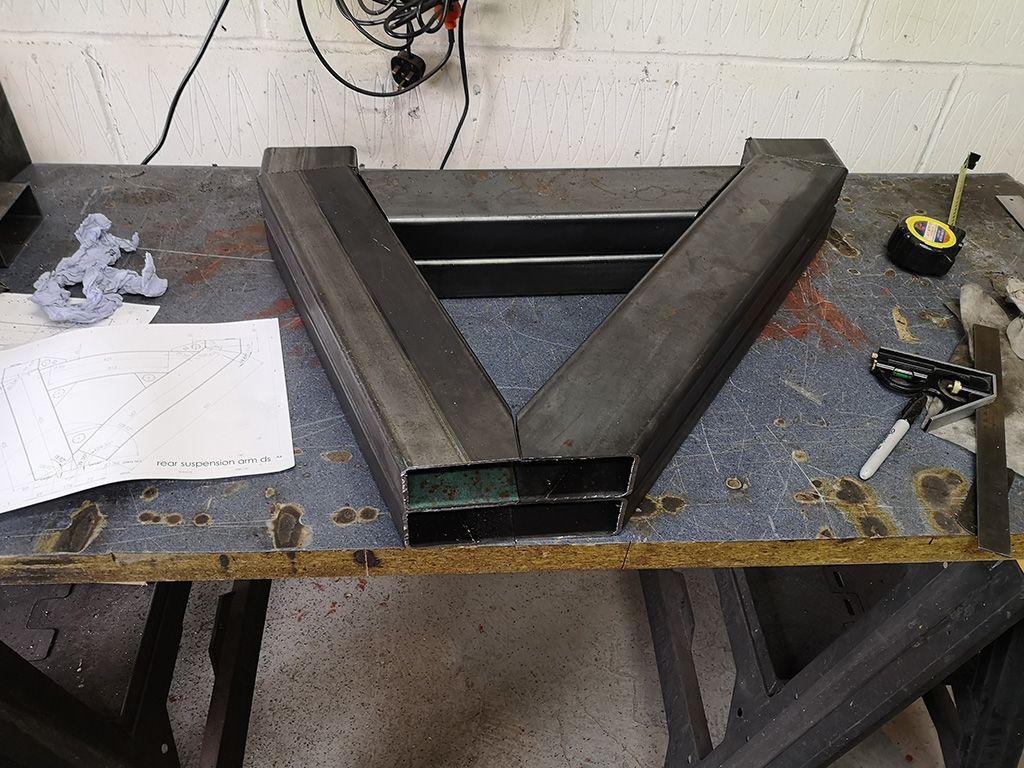
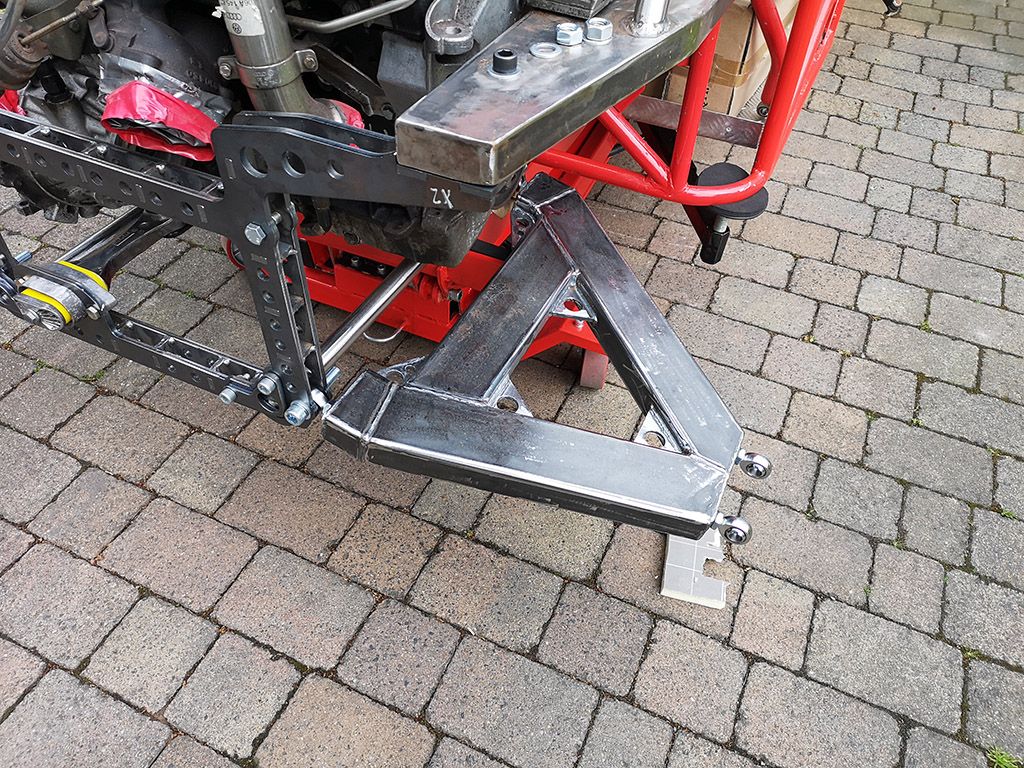
Anyway here are the rear lower suspension arms cut and then tacked together:
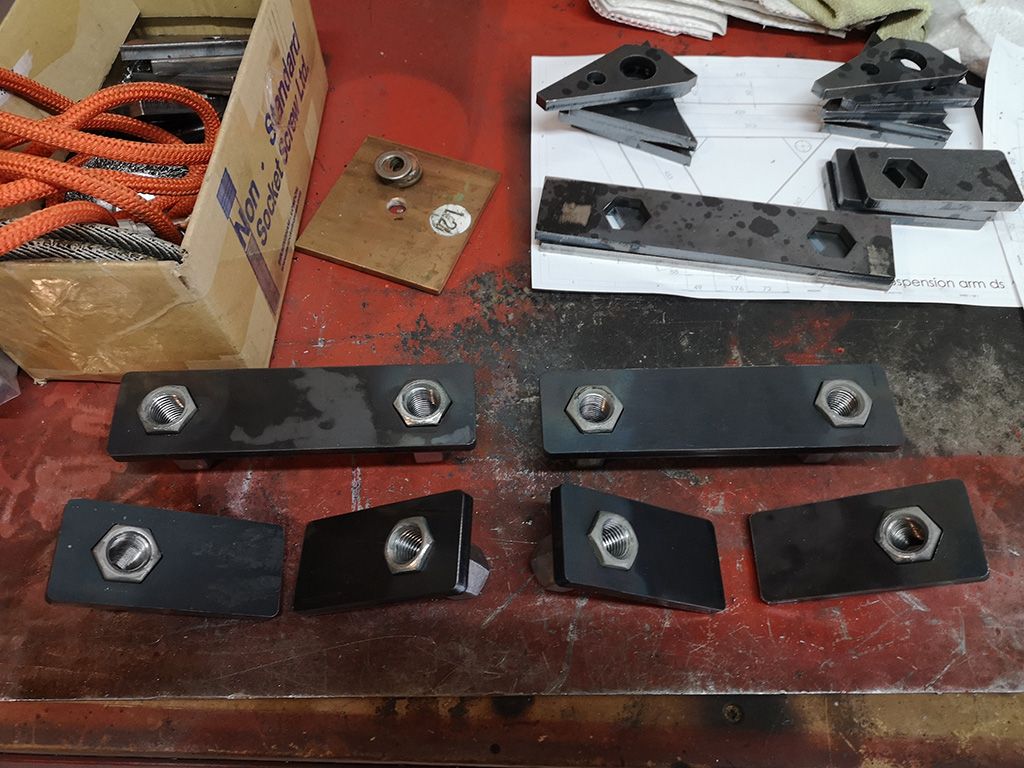
Here are the endplates with the M16 spacers welded in (so I have something for the rose joints to thread into)
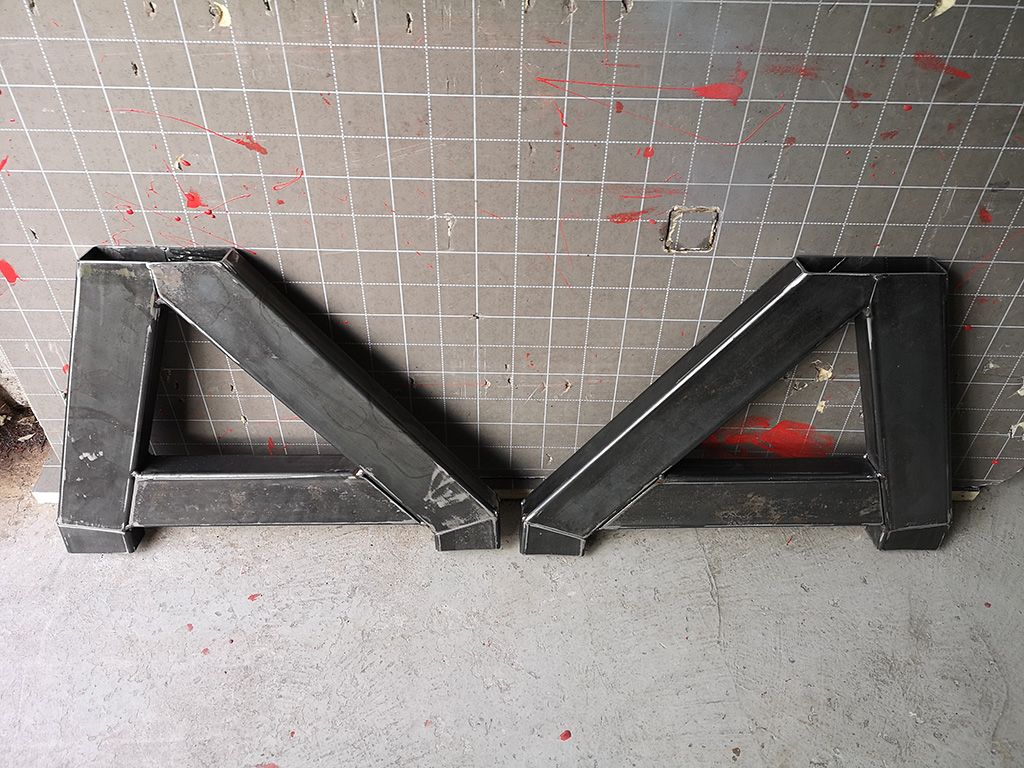
Here are the arms fully welded with endplates and gussets fully welded:
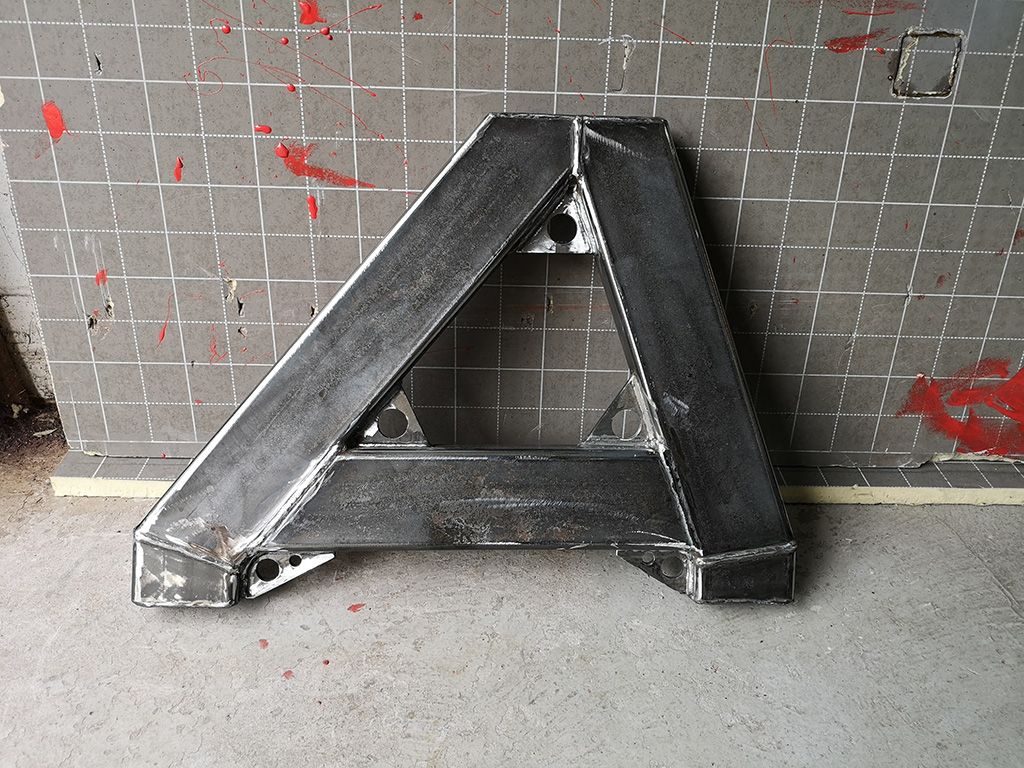

A quick test fit to the subframe with rosejoints and hub carrier (plus a bit of wood):


New chassis connecting assemblies / pins finished and ready to be welded in:
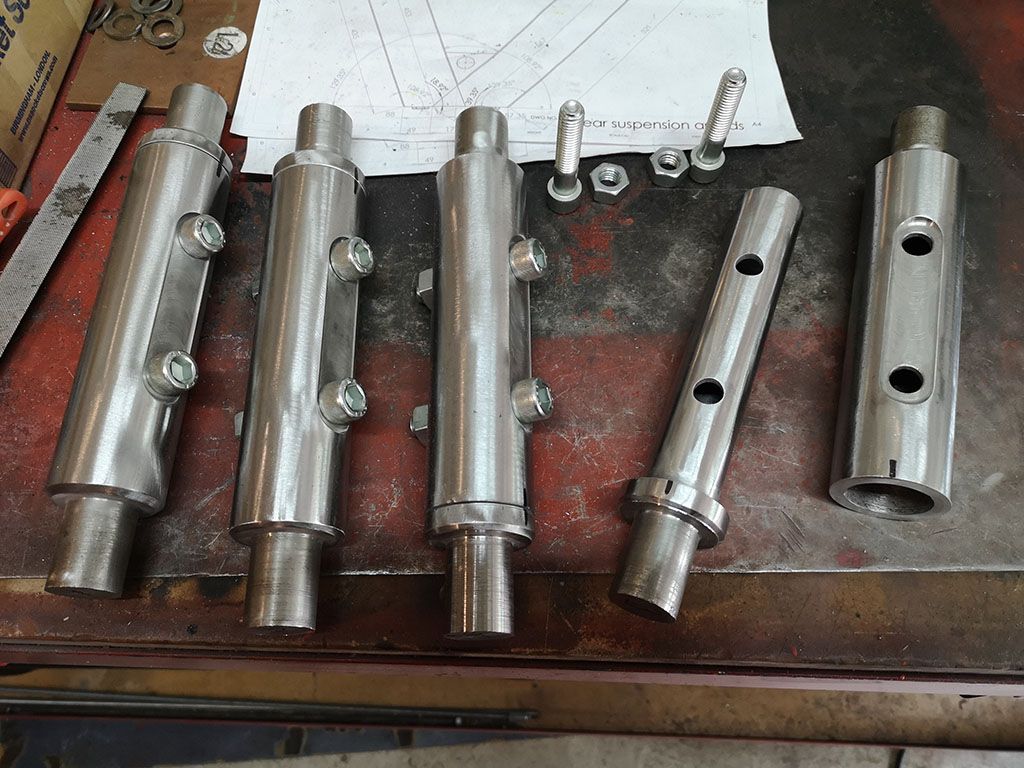
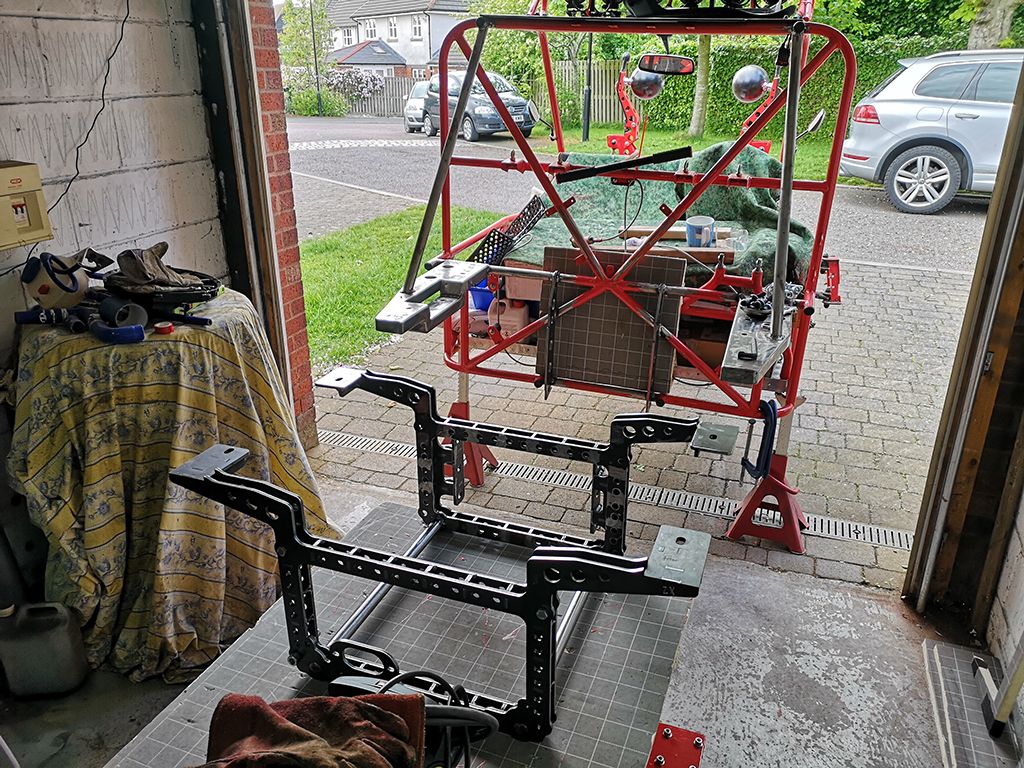
Rear frame attached once again, chassis connecting assemblies / pins are tacked in place at the moment as are the mounting plates to the lower part of the subframe:

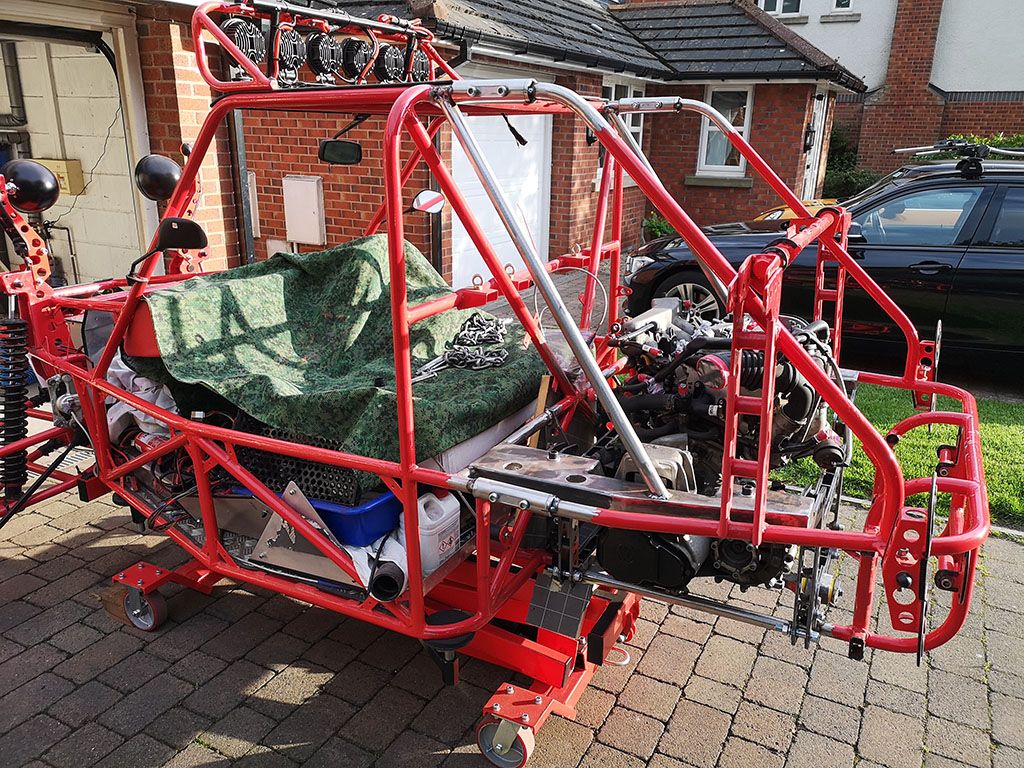

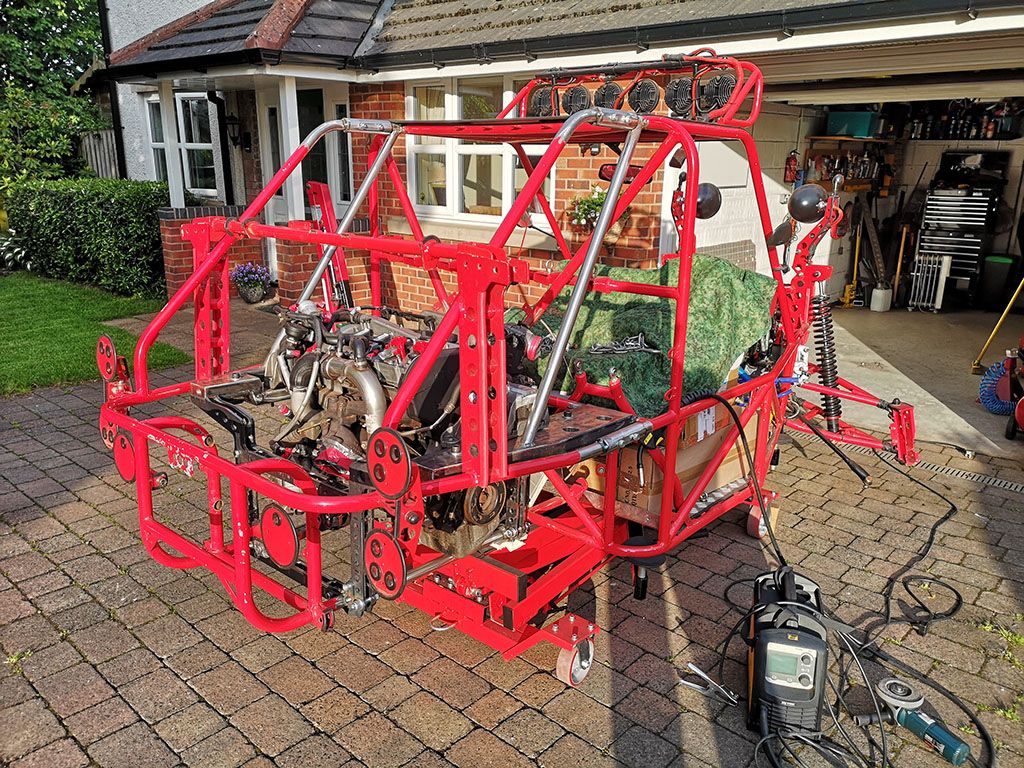
The upper part of the frame where it used to meet the top rollbar had to be reworked quite a bit when the upper connectors were put it but all's good now!!
Next job is to finish of the welding on the connectors, then modify the old upper rear suspension arms to fit the wider subframe so that I can re-fit all the rear suspension and look at the driveshafts.
Next thing on the design side is to finish off the design for the front hub carriers now that ive sorted the Ackerman out! and also prep the mounting solution for the rad and intercooler over the engine (only place it can go) then they can all go for laser cutting!!
Rich
Anyway here are the rear lower suspension arms cut and then tacked together:
Here are the endplates with the M16 spacers welded in (so I have something for the rose joints to thread into)
Here are the arms fully welded with endplates and gussets fully welded:
A quick test fit to the subframe with rosejoints and hub carrier (plus a bit of wood):
New chassis connecting assemblies / pins finished and ready to be welded in:
Rear frame attached once again, chassis connecting assemblies / pins are tacked in place at the moment as are the mounting plates to the lower part of the subframe:
The upper part of the frame where it used to meet the top rollbar had to be reworked quite a bit when the upper connectors were put it but all's good now!!
Next job is to finish of the welding on the connectors, then modify the old upper rear suspension arms to fit the wider subframe so that I can re-fit all the rear suspension and look at the driveshafts.
Next thing on the design side is to finish off the design for the front hub carriers now that ive sorted the Ackerman out! and also prep the mounting solution for the rad and intercooler over the engine (only place it can go) then they can all go for laser cutting!!
Rich
ChaosMS
Active member
Quick update on the progress, had to make some tweaks to the lower arms but all good now, thought I would check for fitment and alignment of the shock mount now that the rear is back one (but mounted further back) so here are a few pics:-
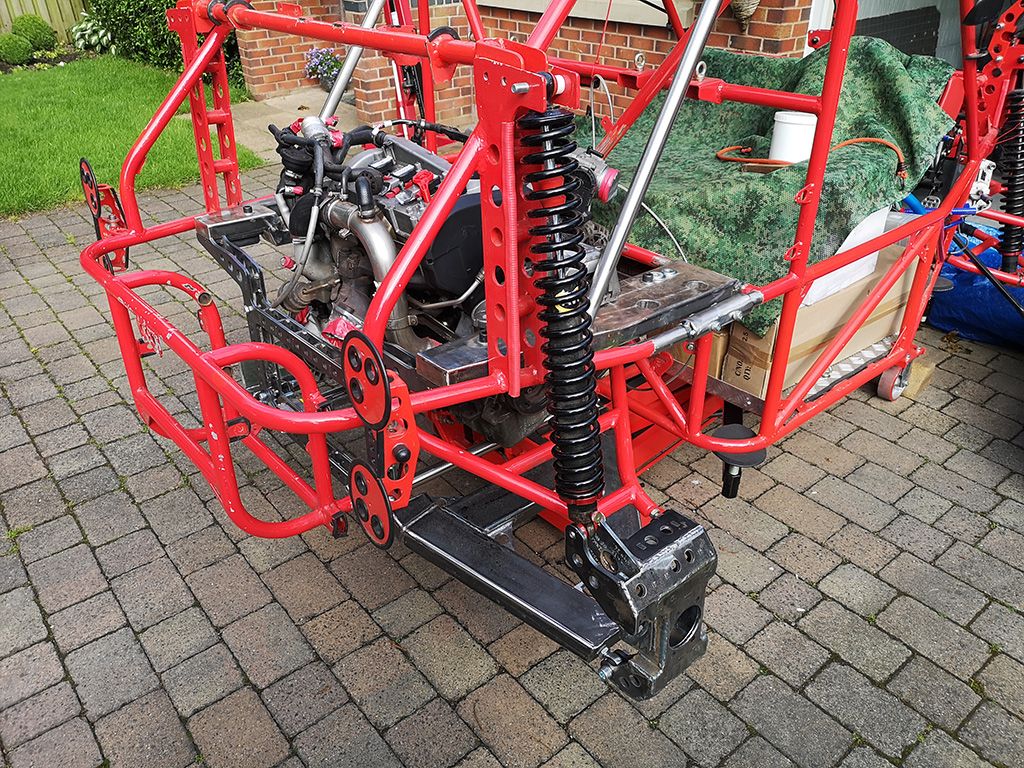
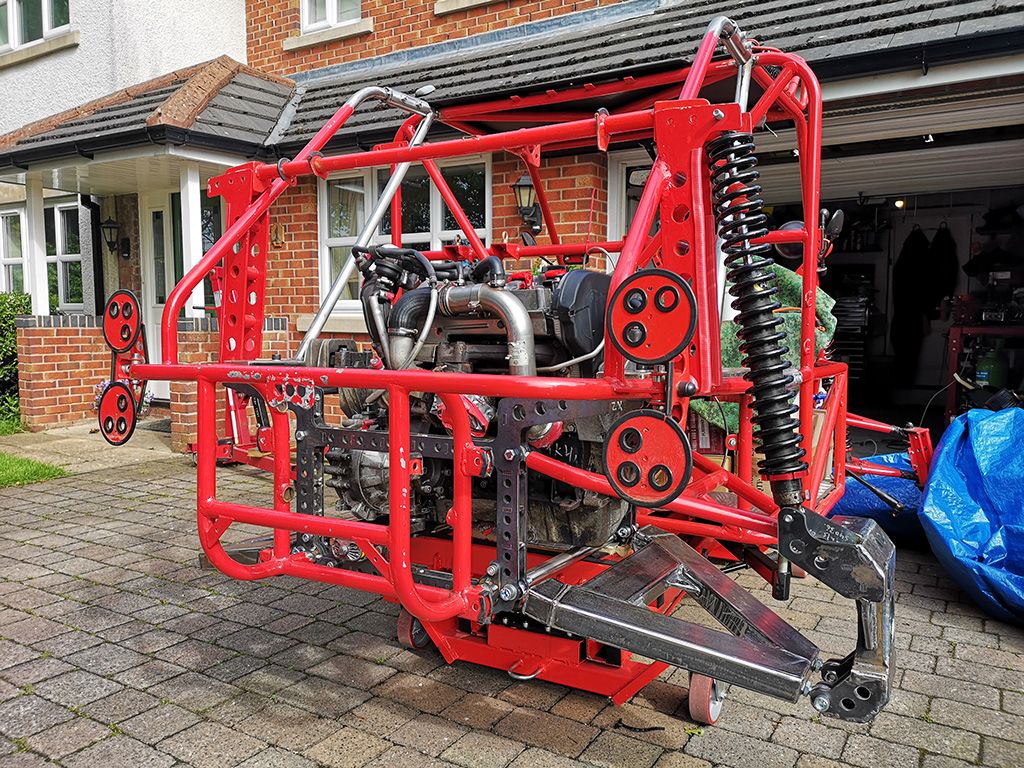

Very pleased with the way its lined up so just need to change the upper wishbone now ;D
Very pleased with the way its lined up so just need to change the upper wishbone now ;D
ChaosMS
Active member
OK so a little more work done this weekend, I re-built the top brace and then trial fitted one wheel to make sure everything would fit ok at the back:
So rear disk and re-built caliper fitted:


plenty of space inside the wheel !!
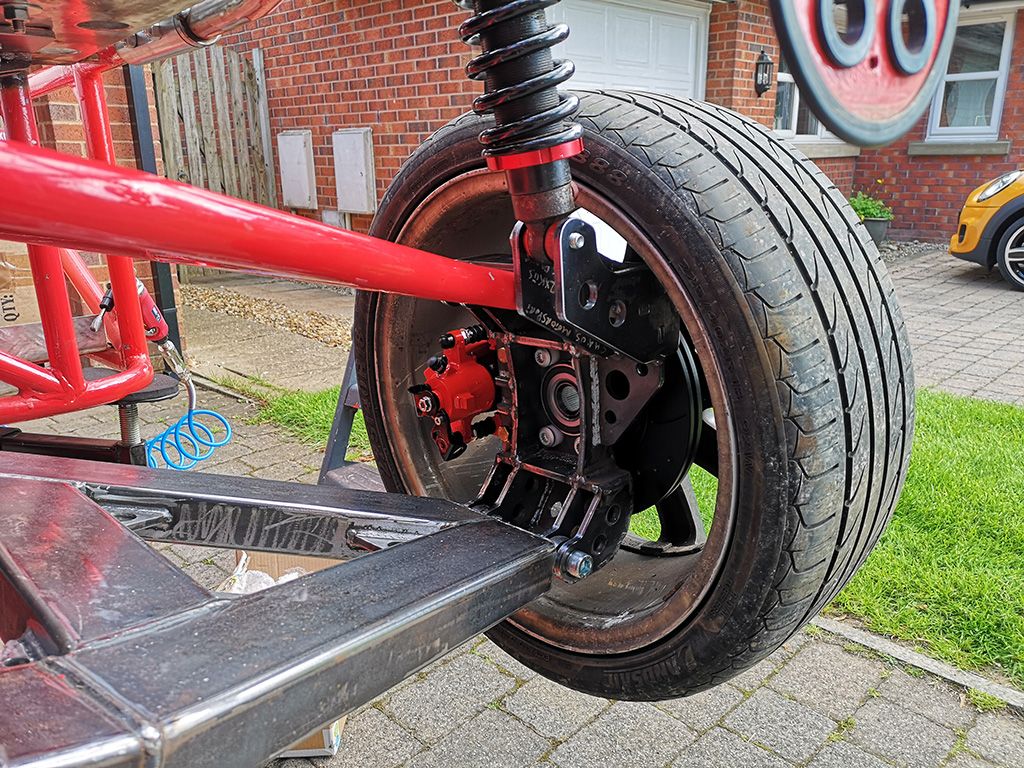
view from the other side
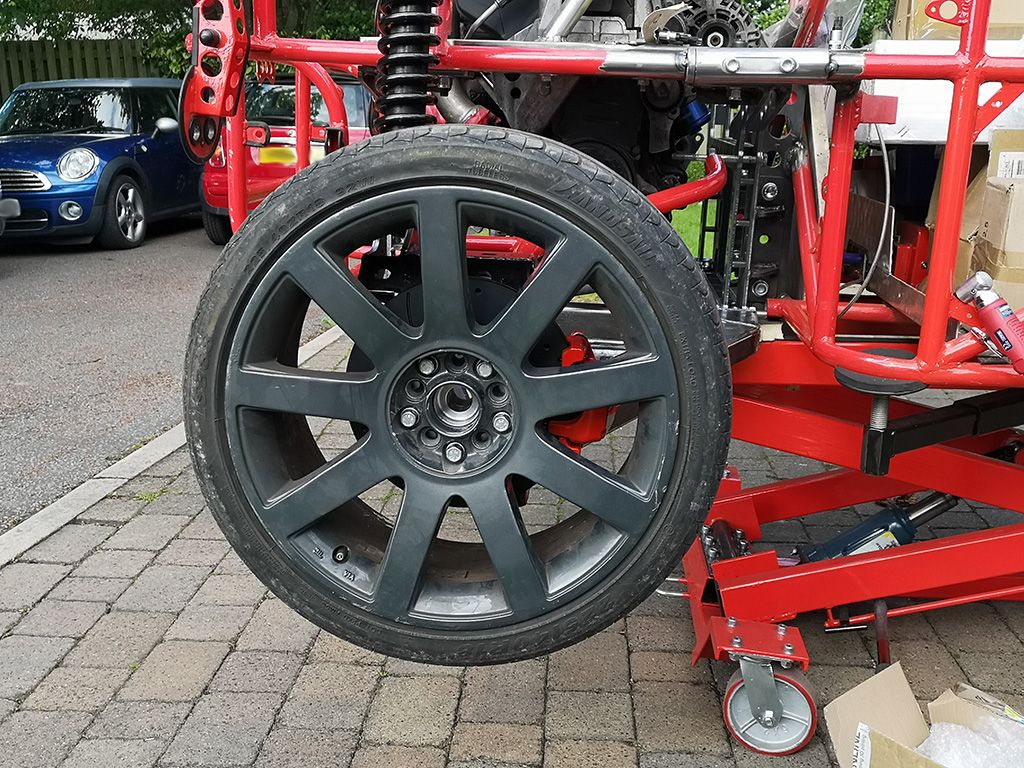
i think they should look pretty good once they have the correct tyres and have been refurbed ;D

So rear disk and re-built caliper fitted:
plenty of space inside the wheel !!
view from the other side
i think they should look pretty good once they have the correct tyres and have been refurbed ;D
ChaosMS
Active member
Quick update time!! - so been cleaning up the rear removable cage to get rid of all the old suspension mounts and what not, basically to make a little room for the back box / cat / pipework etc. I also chopped up the new stainless backbox (must be more careful with that angle grinder) to get an idea of the position and mounting I will need to sort, I've also finished the modifcations to the rear upper old wishbones so they will not fit the subframe correctly here are a few pics from the last couple of weekends:
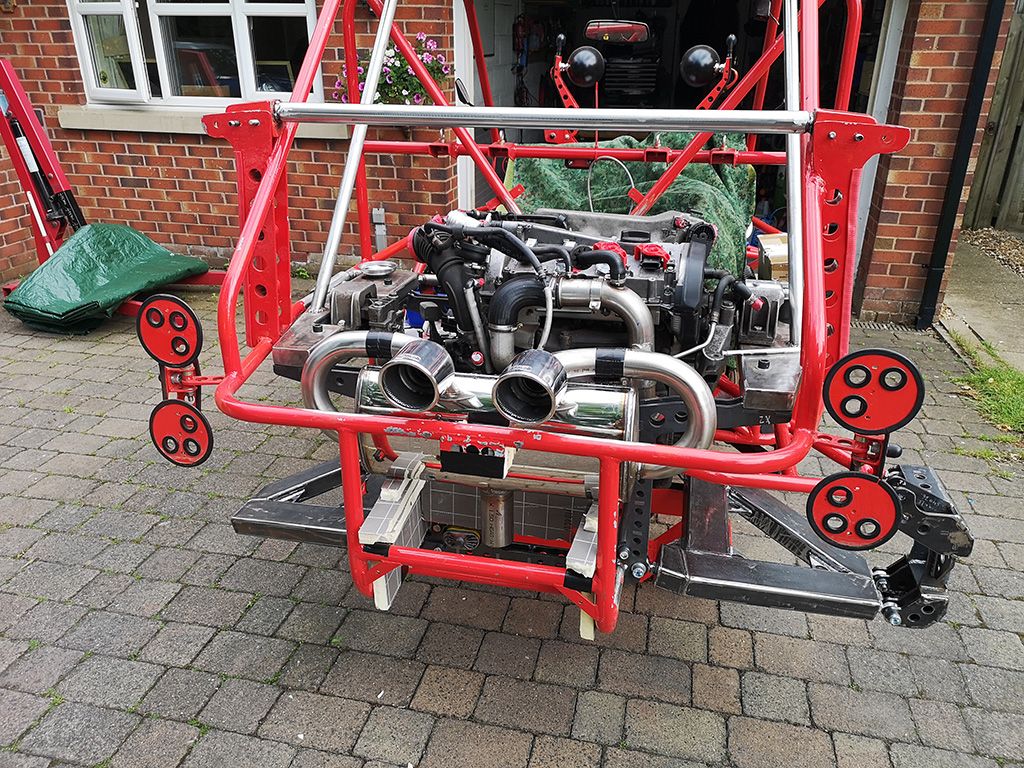
Back box in place with cage cleaned up
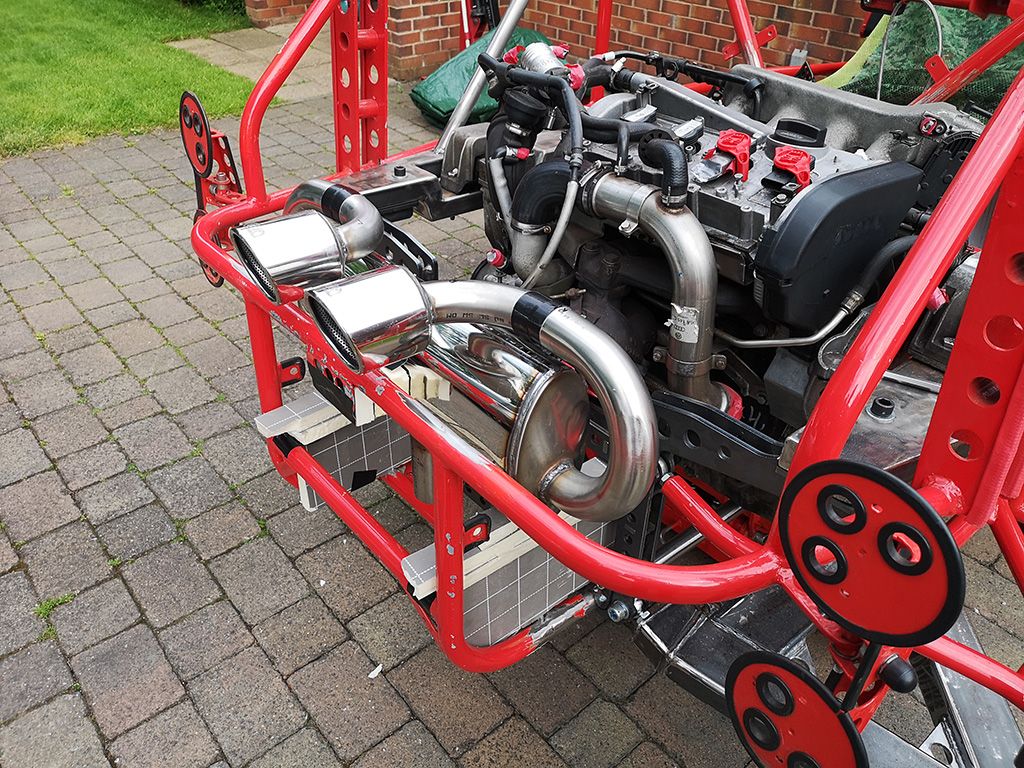
a better view of the space i have
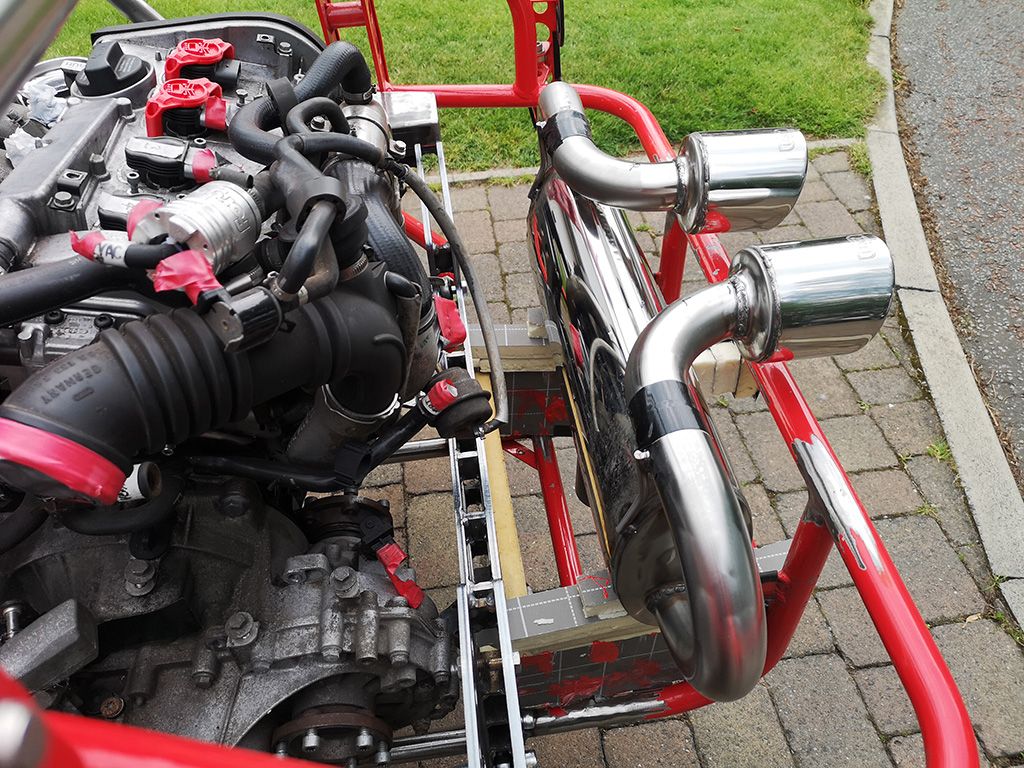
and with all the rear suspension fitted
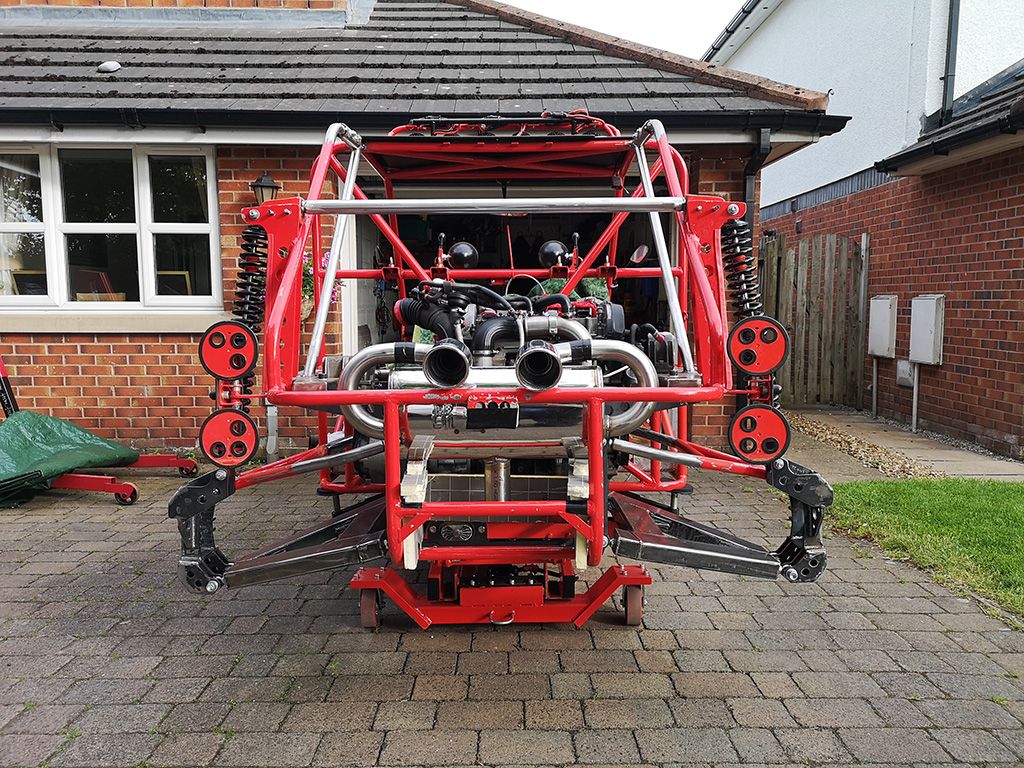
Just getting the back box tigged back up after i attacked it with the grinder then i can sort the rest out, Ive also taken the turbo off the car as im pretty sure I'm going to need to move it!!
Back box in place with cage cleaned up
a better view of the space i have
and with all the rear suspension fitted
Just getting the back box tigged back up after i attacked it with the grinder then i can sort the rest out, Ive also taken the turbo off the car as im pretty sure I'm going to need to move it!!
ChaosMS
Active member
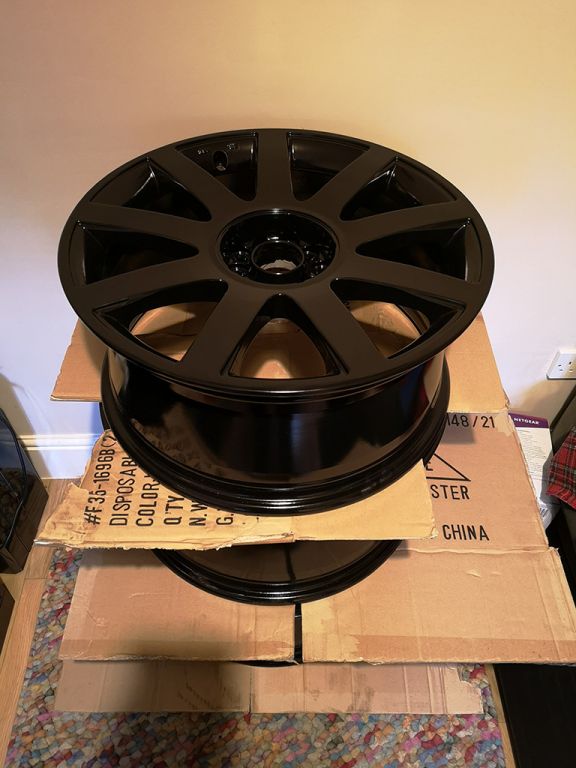
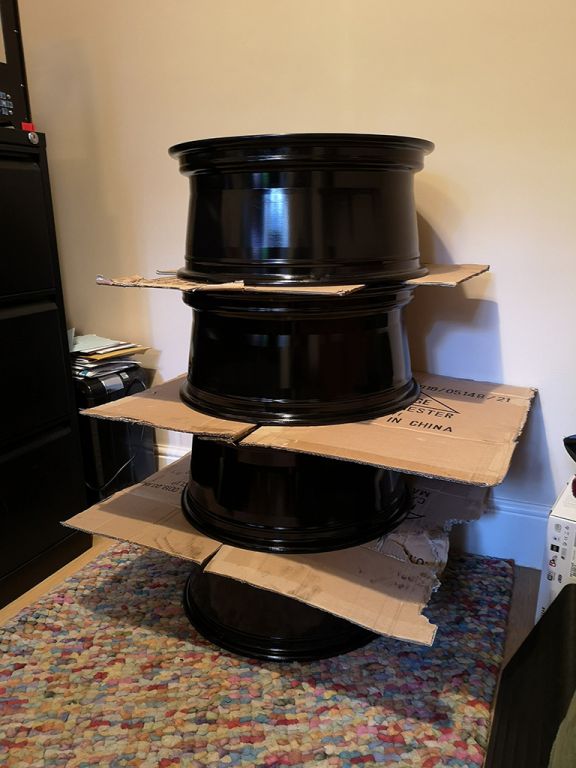
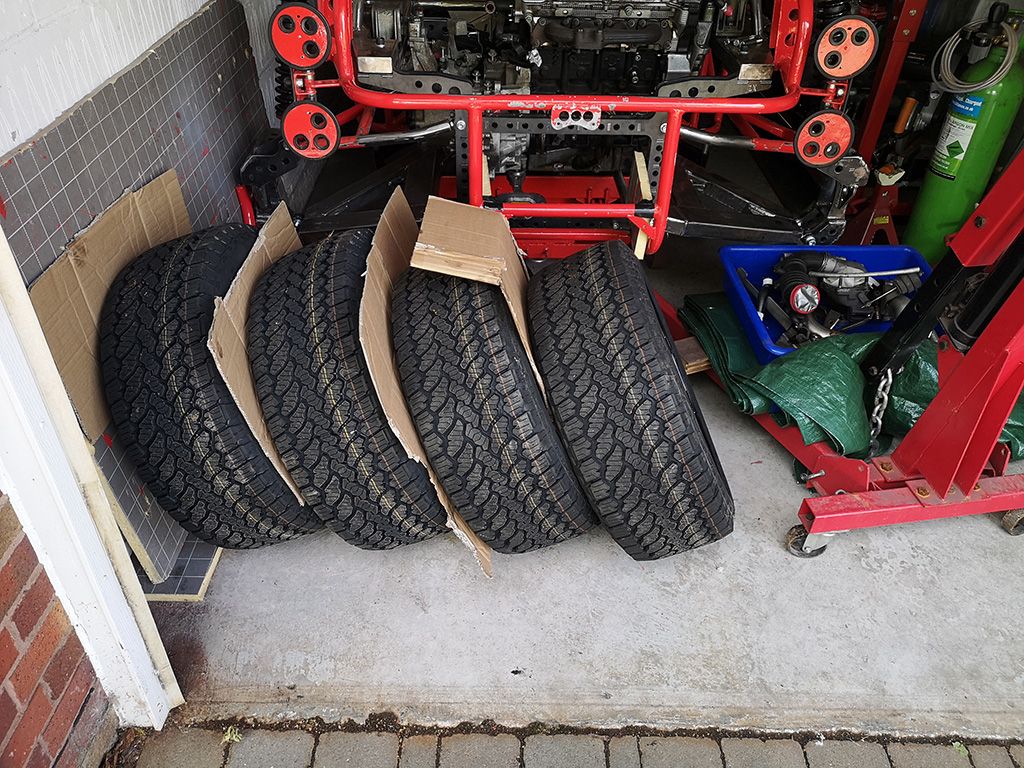
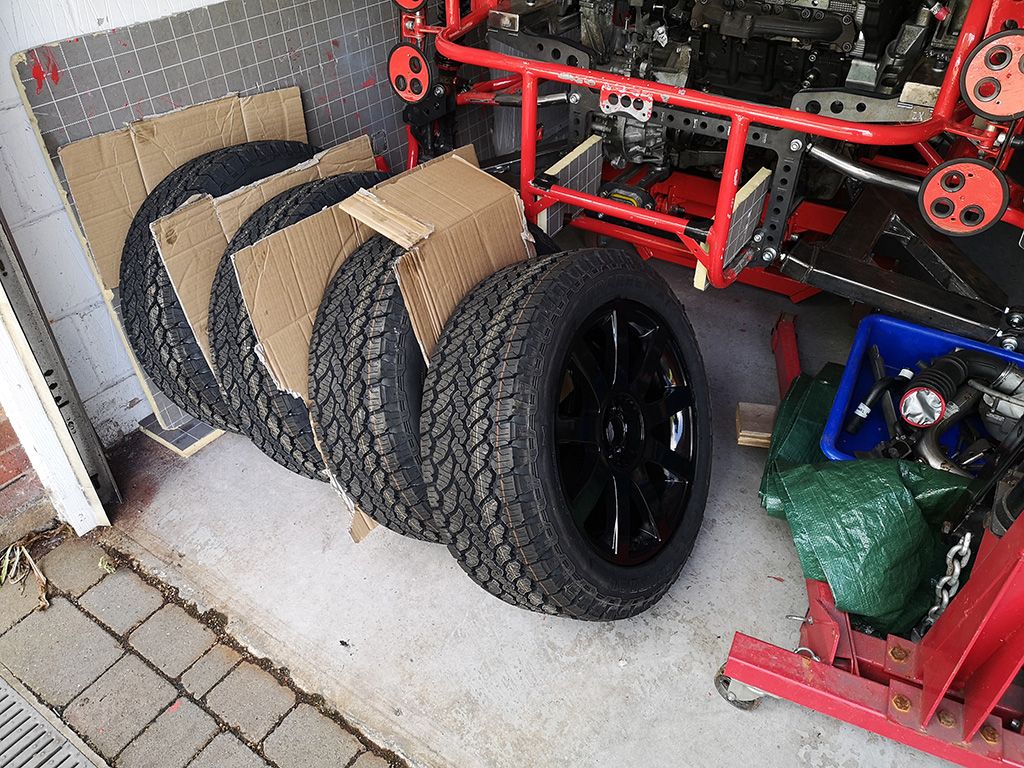
so little bit of an update - I have got the alloys sorted for the buggy!! due to the increased size of the disk and caliper and moving from 4 stud to 5 stud I had to change the wheels from the 15" Ultralite D1's to an 18" rim, in the end I got some replica Audi rims in need of TLC!!
When I got the tyres off and took them to the Wheel refurbisher I discovered only 1 of them was actually round - the rest were dinged and one was very bad, however the guys a Top Wheels in Morecambe did a totally amazing job, fully repaired all dings removed and now properly round!! finished in a nice satin black powder coat!! here you go -

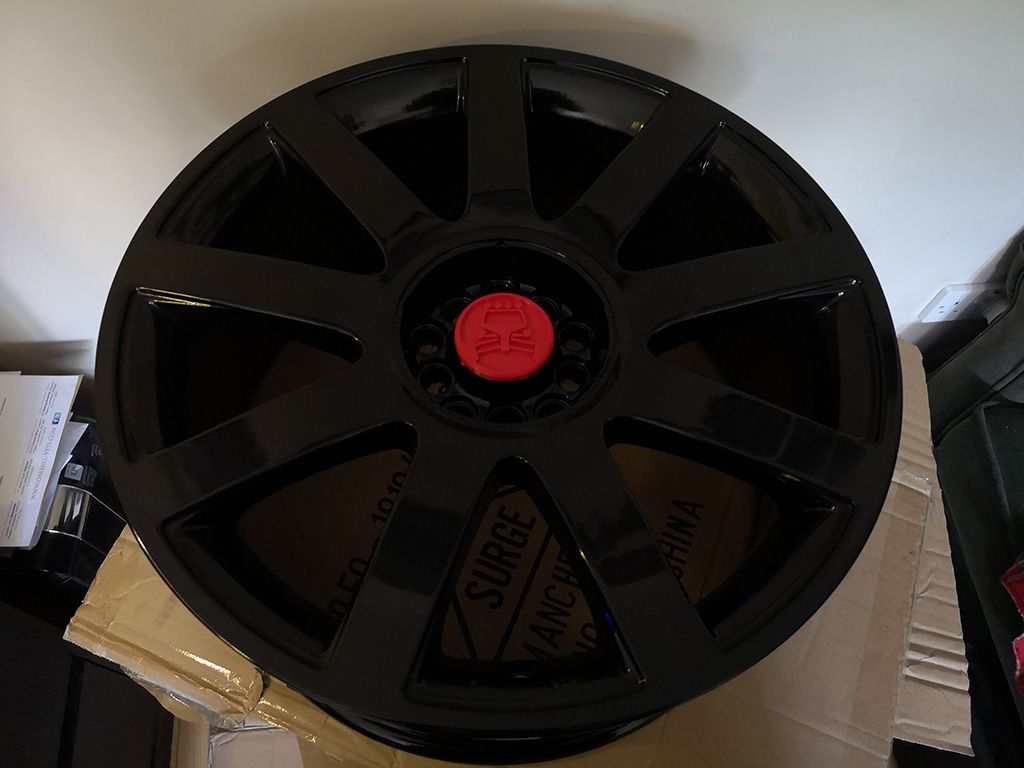
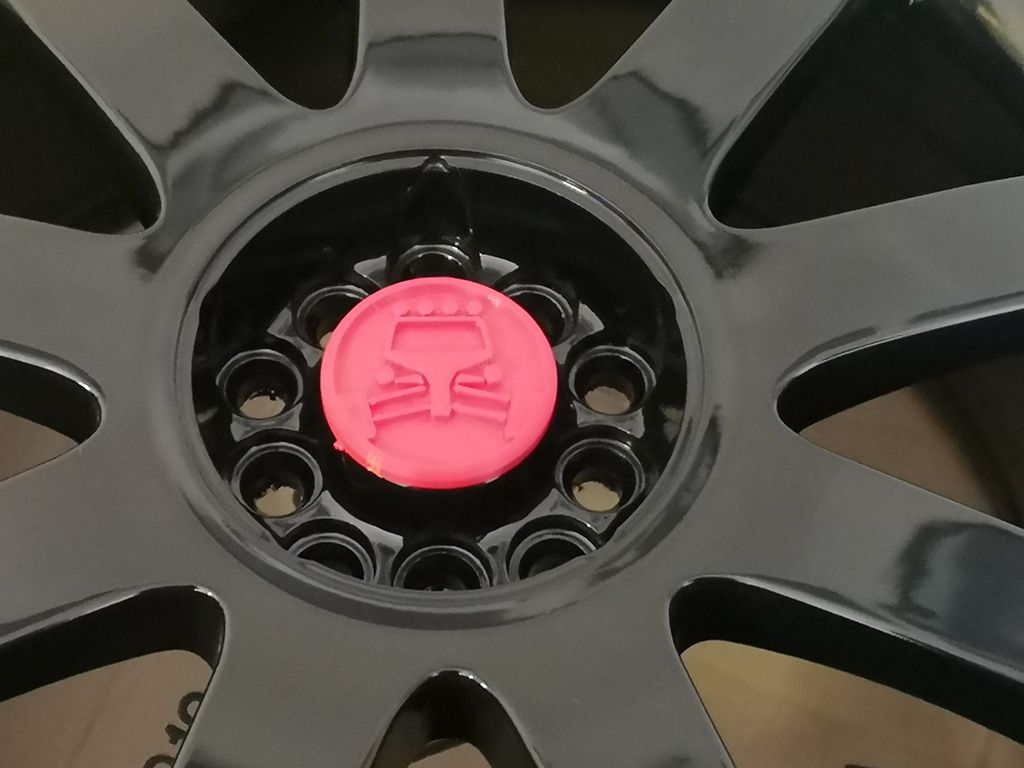
Not going to use the normal centre caps instead im 3d printing my own, here is the first rough print (will paint them black and then sand back to give the red logo)
And then finally with 235/55/18 General Grabber AT3's on!!
Also chopped up the driveshafts and sorted the cv joints for both ends so will post shots soon when I get chance to measure them up correctly!!
Rich
When I got the tyres off and took them to the Wheel refurbisher I discovered only 1 of them was actually round - the rest were dinged and one was very bad, however the guys a Top Wheels in Morecambe did a totally amazing job, fully repaired all dings removed and now properly round!! finished in a nice satin black powder coat!! here you go -
Not going to use the normal centre caps instead im 3d printing my own, here is the first rough print (will paint them black and then sand back to give the red logo)
And then finally with 235/55/18 General Grabber AT3's on!!
Also chopped up the driveshafts and sorted the cv joints for both ends so will post shots soon when I get chance to measure them up correctly!!
Rich