You are using an out of date browser. It may not display this or other websites correctly.
You should upgrade or use an alternative browser.
You should upgrade or use an alternative browser.
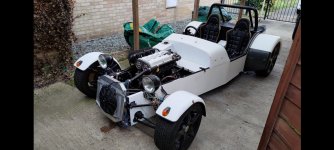
Lotus 7 (Replica) Build
- Thread starter 250buggys
- Start date
250buggys
Well-known member
250buggys
Well-known member
Going to use a multi switch in the 7 to save loads of messing about.
Side lights, dipped, front and rear fogs all on one switch.
Needed to make a bezel to give it a nice IVA friendly radius edge. So I knocked up one in Inventor.
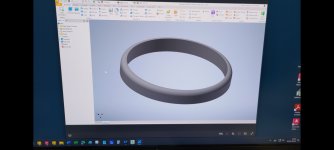
Popped over to see the R&D guys and borrowed their 3D printer.
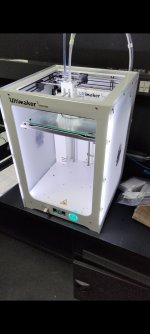
Worked a treat straight off the bat. Went with an interference fit so didn't even need to bond it on.
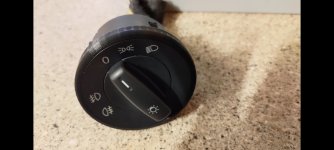
Side lights, dipped, front and rear fogs all on one switch.
Needed to make a bezel to give it a nice IVA friendly radius edge. So I knocked up one in Inventor.

Popped over to see the R&D guys and borrowed their 3D printer.

Worked a treat straight off the bat. Went with an interference fit so didn't even need to bond it on.

250buggys
Well-known member
Rad now not leaking but looking at this fan mounting design I am going to change it.
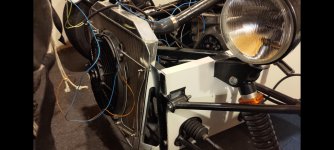
The cooling area lost to the fins from the fan and bracket is significant. I am sure it probably would be ok but it would be a lot more efficient if the fan was moved behind the rad and changed to a pull type. I am also going to nake a cowling to direct air flow.
I also decided that I am going to register this build on a Q plate as I wont need a cat as the emissions test is visual smoke and also won't need a lambda sensor, more weight saving. I can also tune my map for best performance.
I already have a cat built into the silencer and may need this for IVA, not sure what they test at IVA on a Q plate?
250buggys
Well-known member
Still wiring, all pre-comissioned, all tested and works. Just commoning up main, dipped and side lights to run ithem back and sorting out the frame grounds. Just trying to make a nice neat tidy job of it all.
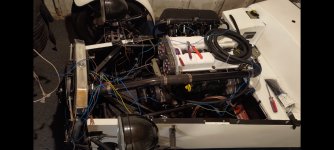
Still having lots of fun!
I am glad I bought this kit when I did as with interest rates, inflation, cost of living this would have been a complete non starter now. On the other hand if I had of bought an Elise it would have been worth twice as much now...

Still having lots of fun!
I am glad I bought this kit when I did as with interest rates, inflation, cost of living this would have been a complete non starter now. On the other hand if I had of bought an Elise it would have been worth twice as much now...
250buggys
Well-known member
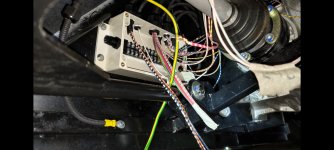
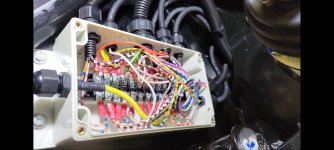
Did a bit (a lot) on my fuse box over Xmas as the weather was rub and could sit indoors wiring.
I am getting right to the stage where I need it fitted so I can get all the wiring terminated.
I keep grabbing a piece of A4 out of the printer and designing it and adding and getting rid of bits etc so never really finished it.
Today I pulled out the laptop and drew it all up on CAD so I could get it all finalised. I think I am there and have a decent schematic to wire to now.
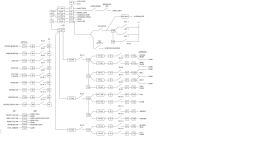
Funny really as when I built the Freestyle I designed as I wired it and then drew it up after.
I am getting right to the stage where I need it fitted so I can get all the wiring terminated.
I keep grabbing a piece of A4 out of the printer and designing it and adding and getting rid of bits etc so never really finished it.
Today I pulled out the laptop and drew it all up on CAD so I could get it all finalised. I think I am there and have a decent schematic to wire to now.

Funny really as when I built the Freestyle I designed as I wired it and then drew it up after.
250buggys
Well-known member
Looking at the attachment I just saw I have no supply to the reverse light. Its been like this most of the day, but progress.....
Another revision on the way.
There are so many relays due to the steering wheel 8 buttons. Every button drives 250mA max which is plenty to switch a relay but not enough to power circuits.
Another revision on the way.
There are so many relays due to the steering wheel 8 buttons. Every button drives 250mA max which is plenty to switch a relay but not enough to power circuits.
250buggys
Well-known member
Have been waiting for a weather window to get some paint on the centre console, nothing but rain at the moment.
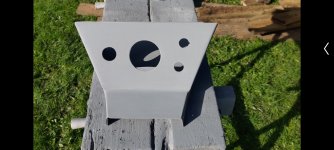
Bit better today
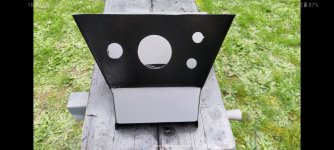
Can get the switch gear fitted and wired now. Will be a nice empty dash with only the lights, heated driver's seat, charging port and ignition switch. Everything else is on the wheel.
The only bad bit about the wheel buttons is trying to find indicators and turn high beam off with any lock in the dark. Other than that should be fine.

Bit better today

Can get the switch gear fitted and wired now. Will be a nice empty dash with only the lights, heated driver's seat, charging port and ignition switch. Everything else is on the wheel.
The only bad bit about the wheel buttons is trying to find indicators and turn high beam off with any lock in the dark. Other than that should be fine.

