Got a Freestyle Buggy at last!

250buggys

Well-known member
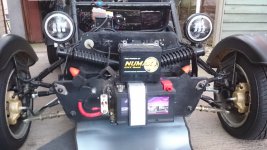
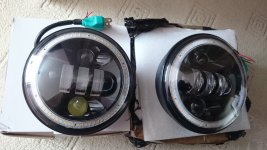
Got my IAC today (individual approval certificate) which is a right result and now it means I can fit these.
DSC_0049.JPG

A nice pair of LED headlights, I couldn't fit them pre IVA as the manual states you need to have auto level lights if you have LED or zenon projector lights and also a washer which I have both on the focus ST and that looks like hard work...

The re-test went well and the sun was shining.

Another hurdle jumped through and now I can apply for registration, hope I get my age related plate.
 

ChaosMS

Active member
Well done mate excellent news!! Another buggy on the road!!

And I love those lights where did you get them?
 

250buggys

Well-known member
Thanks Rich, all the hard work finally paid off.

The IVA examiner mentioned that once you send the certificate off for registration you won't ever see it again and sometimes our favourite government agency are known to loose them in the system so I will make sure I take a copy, if only for memorabilia.

I was looking at LED lights as I was never that happy with the halogen reflectors. I was surprised that I managed to get them pretty much spot on from lining my daily driver up with the garage door and then replicating the beam pattern on the buggy but not very good at lighting up the road.

Most of the LED lights on ebay are for the 7 inch holders but with a bit of messaging I found someone who had the 5 inch version. Not sure they will pass the MOT without auto level or washer and may have to put the halogens back in but I won't have to worry about that for 3 years as I didn't bother with an MOT on the chassis number and took the gamble and went straight for IVA.

I got them from this seller, just send him a msg as he has loads of stock.
 

250buggys

Well-known member
I got my registration docs in the post today so went and got some plates made up.

The DVLA bounced my application back a couple of times, things have changed since I registered my last build back in 2009. That was at a local office and they insisted I insured it on the frame number as part of the application.

Well another freestyle on the road all properly registered.

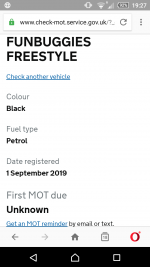
Screenshot_2019-08-29-19-28-00.png

Well it will be on Sunday 01st, I figured there might be a delay and I would loose a month in tax so I went for the 01 Sept as the start date and it worked out about right.

Might well be the last Freestyle to be registered as there aren't many projects on the go at the mo.
 

250buggys

Well-known member
I have always had issues starting my buggy, not on a cold start but when re-starting. It usually starts 1st turn but once the engine is warmed up it really has difficulties re-starting like the battery is flat.

At first I didn't think it was the battery and more like a Volt drop somewhere in the wiring. I replaced all the wiring with 25mm2 from the battery to the starter and still the same so I swapped out the starter but still the same.

It was a bit of a strange fault but I then tried a 12V battery of my dirty diesel and that seems to have cured the fault on warm start. Very strange fault probably something to do with the compression?

The ride on lawnmower battery had loads of cold crank amps and fitted the bracket nicely but I have now chopped it.

DSC_0747.JPG
 

250buggys

Well-known member
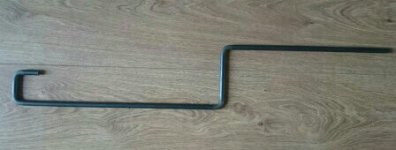
I was never very happy with the shepherds crook that came with the kit, with a lot of messing about I could get all the gears, it was reverse that took a bit of time to find dialing in the linkage.

The original linkage was a 180 degree bend piece of bar welded to a piece of tube bent at an angle welded to some bar then another piece of tube bolted to the gear selector. This made for very sloppy and un-efficient gear changes, so I had a measure up and came up with a new design

1584222608685.jpg

With this setup ill hopefully be able to make it work a bit better, I will cut a left hand thread and put a bottle screw so I can adjust it and instead of the wobbly roll pin on the gear box end I will JB weld the linkage in situ and when I have it just right will then weld it up for a more solid gear change.

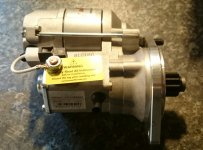
Alan was 100% correct with the recommendation of a high torque starter motor to cure my starting issues.

DSC_1233~2.JPG

Fitted a Powerlite RAC468 high torque starter motor and that spins over much faster and fires up straight away but still rated at 1KW.
 

250buggys

Well-known member
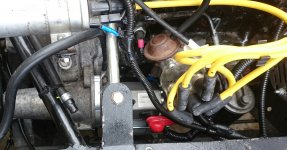
I had to remove both seats to remove the lower fire wall panel to tighten up the bolts as it has a silly self enclosed captive bolt and requires very limited access to fit this.

In there somewhere...

DSC_1241~4.JPG

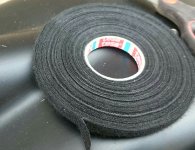
Found this,

DSC_1242~3.JPG

Called Tesa tape, going to use this on my wiring loom to make it look pro...
 

250buggys

Well-known member
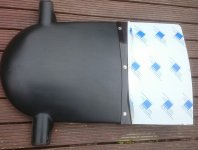
Made a wind shield for the buggy out of some 3mm perspex, see though but heavy black tint.

Most people usually mount this to the frame but Danny's aproach of mounting it to the fibreglass looked like the best idea. It adopts the curve and looks like a riot shield...

DSC_1383~6.JPG

Should make a good addition to the buggy.
 

Danny

Administrator
yup I have a solid black on on mine which most of the time is fine... until you are going up a steep incline then you cant see anything :D
 

250buggys

Well-known member
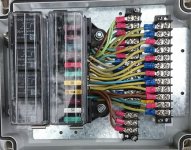
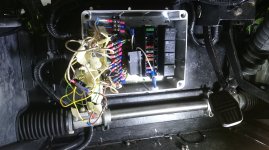
New fuse and relay modules brought out to terminals and all belled out. Hopefully this should cure my little issue.

Got some decent relays also, not the ones that fall apart, IP67 rated so nice and secure.

DSC_0058~2.JPG
 

250buggys

Well-known member
Got my new fuse box installed, lucky I labelled everything up. Now its all working I just need to tidy it up.

Fuse Box.JPG

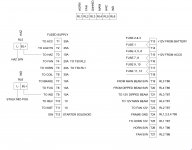
Put together a wiring diagram while it was all fresh in my mind, no doubt this will be useful in the future. Will stick it on the back of the lid.

CC Fuse Box.JPG
 

250buggys

Well-known member
Danny":goq0sgbs said:
yup I have a solid black on on mine which most of the time is fine... until you are going up a steep incline then you cant see anything :D

Danny, it makes sense now but too late, I should have got your advice before hand.

What I should have done was go for a non tint and I could have applied tint film until I was happy with the results. Now as Danny says it may be too dark and their is no going back from that...
 

250buggys

Well-known member
Freestyle on the quest for better braking.

Jumping out of the daily driver it is easy to see the Freestyle is due for better breaking capacity. Driving the Freestyle you need to be able to read the road!

Having the drum brakes on the rear may well have been the first port of call but can't see an easy solution with the hand brake etc.

I am way behind you guys as you have all done this in your builds before I have got to this stage.

So as a quick fix for a shorter stopping distance I decided to look at the front end.

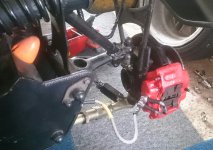
Fitted some better stopping power today. Hopefully will see some better results :)

I know it has added to the Un sprung weight and since putting it on the weigh bridge at 510Kg I was meant to be reducing weight, braking is top priority at the moment.
 

Attachments

  • DSC_0287~2.JPG
    DSC_0287~2.JPG
    1.2 MB · Views: 4,287

Phaeton

Moderator
Staff member
Chris, just be careful in the wet now, with too much front end braking there is a tendency to just lock the front & then you lose all steering. Couple of people have upgraded to Mini 4 pots in the past & I'm sure somebody went back to 2 pots as they felt it was safer. I think somebody considered a servo not sure if they went through with it, never had a problem with the brakes, yes they are different, but so much else about the Freestyle is not sure it matters.

With regards to the rears, 2 relatively easy options (I've done both) change the whole of the rear subframe to a MGF one, which along with the K series engine gives you a whole new vehicle. Second method is to use Golf calipers, I did a write up on it a few years ago but it looks like all the images have been chewed up by Photobucket. Using Mini front hubs I got the rear of the caliper mounting holes machined flat then bolted the calipers up to them found this image from before the machine but shows the principle, can't believe that was 13 years ago.


Phaeton

Moderator
Staff member
I seem to think mine were MKII's but I think Rally Design or somebody like that were doing new MKIV's for not a lot of money, somebody bought a set of them & they were the same. These are the ones you'd be looking for

 
Top