You are using an out of date browser. It may not display this or other websites correctly.
You should upgrade or use an alternative browser.
You should upgrade or use an alternative browser.
Got a Freestyle Buggy at last!
- Thread starter 250buggys
- Start date
I only asked about the engine running in case you hadn't actually got reverse properly with the gearstick & you only thought you were in reverse, but if you say it selects well then that's probably okay. Again from the 1st page you have a shortened gear stick, maybe try the original one? Do you have to lift to get reverse?
With regards to Acewell your maths is logical, the only thing you can do is compare with a sat nav or wait until you get the test station, maybe I was lucky but the guys at Nottingham seemed to have the attitude it's going to pass as long as everything was okay. But have heard others have had the experience that they felt that the tester wanted to fail them & only passed them if they must type of attitude.
I can't understand the equation you've put, well I understand it, but it makes on sense as 20/10+6.25 would only be 8.25mph, I'll download & look at the manual at work tomorrow
250buggys
Well-known member
Phaeton":2p86mc0z said:I only asked about the engine running in case you hadn't actually got reverse properly with the gearstick & you only thought you were in reverse, but if you say it selects well then that's probably okay. Again from the 1st page you have a shortened gear stick, maybe try the original one? Do you have to lift to get reverse?
Hi Alan, yes i have to lift the stick for reverse gear
I tried a different stick that I had and no amount of adjustment of the switch turning it in/out made any difference.
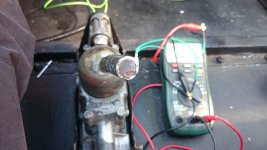
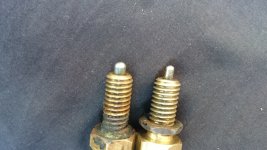
There is quite a substantial difference between the new and the old reverse light switch, do you think this is it of could there be something inside the shifter box that is worn, broken or missing. I can take this out to have a look but not sure what I am looking for.
I made a short video of what is happening so you can see.
https://youtu.be/6E2fxdPliRQ
The stick goes up and over to the right and switch is made but when it is in gear the switch contact is broken.
Do you happen to have an reverse light switch still in your collection of parts you would be willing to send me to try or have you moved on all your a series parts?
I noticed the part number has an A on the end now but not sure what that means.
Problem is it's a long time since I did anything with the A series I'm relying on memory which as I forget things when I get to the top of the stairs isn't easy. Don't think I have any A series stuff left pretty sure I let it all go, but I'll have a look in the workshop on Sunday I'm fetching my father back from his brothers in Blackpool tomorrow.
250buggys
Well-known member
So I rekon that's just about it for the buggy build, really pleased with it as it looking great. Paint applied to the side box section covers, nicely colour coded now to match the rest.
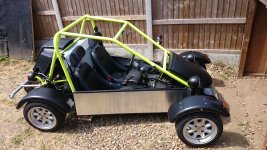
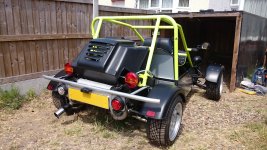
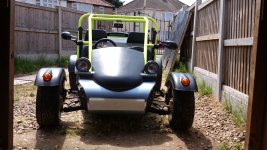
Just a handful of jobs to do before I can book it in for the IVA test.
List as follows :
Sort out reverse light switch
Set up tracking front and back, setup geometry.
Set fuel mixture
Set head lamp aim and brake test
Fit fuel breather (now arrived)
Scan invoices, collate build diary pics and save to disc. Fill out paper work.
Calibrate spedo
See if I can find some private road to get some reliability miles on the clock.
Send off paper work and hope for the best. Thanks for all the help and advice
250buggys
Well-known member
So I dragged myself out of bed this morning at 04:00 and took my buggy up to the Norwich test centre for an 08:00 IVA..
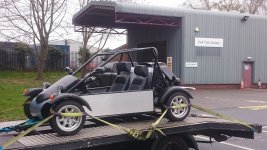
When I got there another kit conversion turned up so it was nice to have someone to chat to about their build experience. It was a Jaguar 4.3L 6 cylinder.
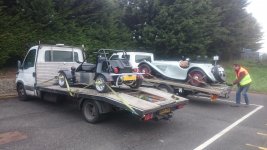
The guys there are really friendly and were open to questions and made the whole experience much better than I was expecting.
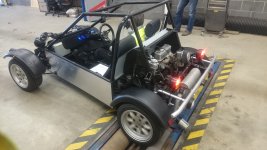
On the whole a very good day as I only have two things that I need to address:
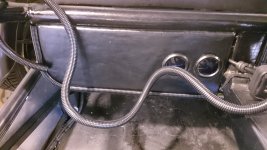
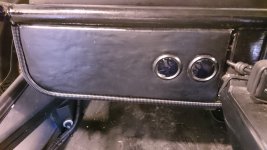
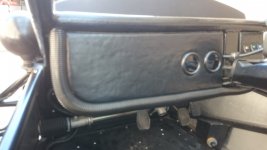
1) the bottom of the dash needs to be a 19mm radius, I don't know how I missed this in the manual. Interestingly the other chap failed on this too.
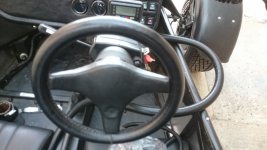
2) I need to have a collapsible steering column / boss, I think I can hopefully get an off the shelf something that will do the trick. It's my own fault I did read this in the manual thinking the freestyle supplied bits would be OK.
Also my manufacturer plate didn't have a box round it so I'll probably get out the scriber out and add one.
Other than that it shouldn't be long before I can book the re-test.

When I got there another kit conversion turned up so it was nice to have someone to chat to about their build experience. It was a Jaguar 4.3L 6 cylinder.

The guys there are really friendly and were open to questions and made the whole experience much better than I was expecting.

On the whole a very good day as I only have two things that I need to address:
1) the bottom of the dash needs to be a 19mm radius, I don't know how I missed this in the manual. Interestingly the other chap failed on this too.
2) I need to have a collapsible steering column / boss, I think I can hopefully get an off the shelf something that will do the trick. It's my own fault I did read this in the manual thinking the freestyle supplied bits would be OK.
Also my manufacturer plate didn't have a box round it so I'll probably get out the scriber out and add one.
Other than that it shouldn't be long before I can book the re-test.
250buggys
Well-known member
New collapsible steering boss arrived.
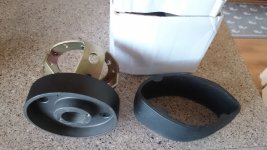
The centre hole with the splines for the column fits ok but the fixing holes for the steering wheel are either a 74 or 76mm PCD where as I need a 101mm PCD.
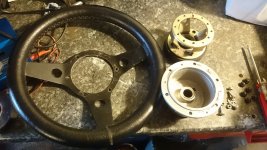
So I set out to make an adapter, I knocked up a model in AutoCAD and printed it out to use as a drilling template.
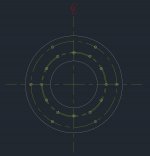

The centre hole with the splines for the column fits ok but the fixing holes for the steering wheel are either a 74 or 76mm PCD where as I need a 101mm PCD.

So I set out to make an adapter, I knocked up a model in AutoCAD and printed it out to use as a drilling template.

250buggys
Well-known member
wagon_1.0":nes8oeea said:Wow - well done! that's a tremendous outcome! congratulations.
Thanks Alistair, that's the 2nd IVA test that engine cover and exhaust have been through now
250buggys
Well-known member
Danny":135uf2ds said:So did you repaint the chassis before the iva?
Thought it was bright yellow?
Danny you are right, the yellow faded on top of the frame and I wanted it looking tidy for the IVA. It was probably down to UV.
Danny
Administrator
Ah I see... thought I was going mad at first250buggys":3scumtvp said:Danny":3scumtvp said:So did you repaint the chassis before the iva?
Thought it was bright yellow?
Danny you are right, the yellow faded on top of the frame and I wanted it looking tidy for the IVA. It was probably down to UV.
Glad you are getting there with it
Sent from my SM-N950F using Tapatalk
250buggys
Well-known member
Danny":2zqerigs said:Ah I see... thought I was going mad at first250buggys":2zqerigs said:Danny":2zqerigs said:So did you repaint the chassis before the iva?
Thought it was bright yellow?
Danny you are right, the yellow faded on top of the frame and I wanted it looking tidy for the IVA. It was probably down to UV.
Glad you are getting there with it
Sent from my SM-N950F using Tapatalk
Thanks Danny, soon be on the road...

