You are using an out of date browser. It may not display this or other websites correctly.
You should upgrade or use an alternative browser.
You should upgrade or use an alternative browser.
Got a Freestyle Buggy at last!
- Thread starter 250buggys
- Start date
250buggys
Well-known member
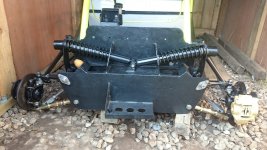
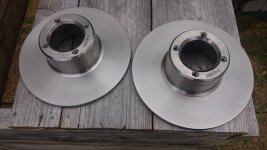
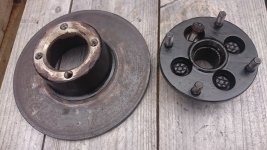
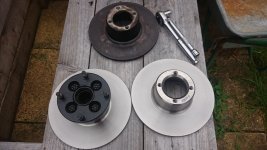
New discs now fitted to buggy
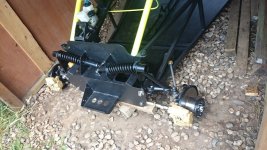
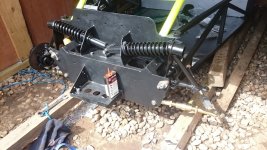
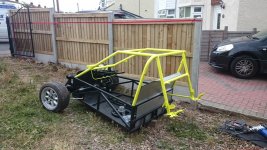
Got the front wheels back on, (quick photo before the second one went on)
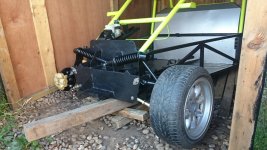
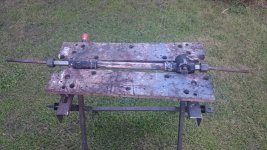
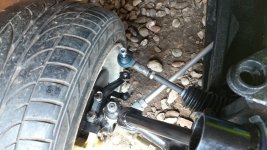
Steering rack next...
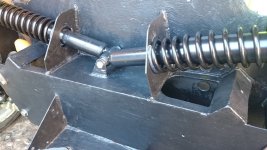
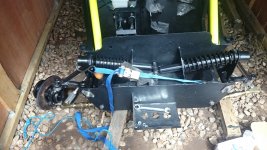
I seemed to have misplaced (or rather lost) a nut for one of the bump stops, it doesn't seem to have a thread I can substitute a nut from my huge collection so I guess I will order a new set as with trying various nuts the stud now rotates with very little force inside the bump stop.

Got the front wheels back on, (quick photo before the second one went on)

Steering rack next...

I seemed to have misplaced (or rather lost) a nut for one of the bump stops, it doesn't seem to have a thread I can substitute a nut from my huge collection so I guess I will order a new set as with trying various nuts the stud now rotates with very little force inside the bump stop.
250buggys
Well-known member
I cut 4 sections of 25 x 25mm box section to make some mounts for the seats.
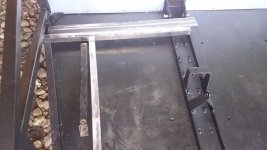
I realised this was going against the original plan where previously I wanted to mount the seats on the floor and completely remove the seat runners, this would then give me extra clearance and hopefully get the steering wheel off my knees.
The seat runners are 35mm high, by mounting on the 25 mm box section I would have gained very little extra clearance for my efforts so I have come up with a better compromise. I have found some 12.7, 16 or 19.1mm box section I could use for this job but rectangle box section would be much better suited. I have found some 40 x 20mm but 30 x 15mm may work if I can find some stock.
It is funny with buggy building, you often go down one route then do a complete U turn and head off in another direction...
250buggys
Well-known member
250buggys
Well-known member
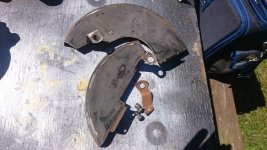
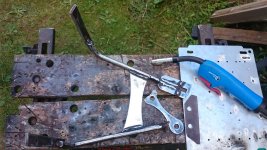
I haven't done any welding in ages so I thought I would have a look at the cycle wing mud guard brackets. I knew this would be a bit of a pain as these were in pieces and not fitted to my buggy when I picked it up. (Danny mentioned that these often fail). I suppose they pick up all the spray from the road?
First thing, some time with the grinder and flap disc to get all the old paint off.
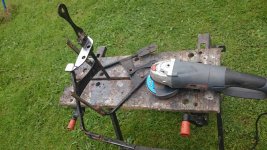
One of the parts from the assembly was missing, as the other side was in pieces I picked up some 4mm steel and used it as a template and made a mirror image for the other side.
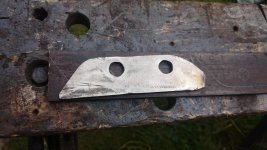
I knew it would be difficult to get this right as the brackets are constrained in four places, the top picks up the two holes from the steering arms and the lower section the two brake calliper fitting holes, as well as the disc brake dust shield.
What could have been a good idea would have been to fit the bracket in position and spot weld it in place, then put in the vice and finish off. Unfortunately I couldn't do this as I have been using flux cored MIG wire and this produces heaps of splatter, there is no way I wanted this over my nice shiny paint work!
The gasless MIG setup seems to be more trouble than practical, (keen to know if anyone else uses gasless and how they get on?) my MIG does both so will get a regulator, flow meter and a gas bottle and I am sure I will achieve better results.
First thing, some time with the grinder and flap disc to get all the old paint off.

One of the parts from the assembly was missing, as the other side was in pieces I picked up some 4mm steel and used it as a template and made a mirror image for the other side.

I knew it would be difficult to get this right as the brackets are constrained in four places, the top picks up the two holes from the steering arms and the lower section the two brake calliper fitting holes, as well as the disc brake dust shield.
What could have been a good idea would have been to fit the bracket in position and spot weld it in place, then put in the vice and finish off. Unfortunately I couldn't do this as I have been using flux cored MIG wire and this produces heaps of splatter, there is no way I wanted this over my nice shiny paint work!
The gasless MIG setup seems to be more trouble than practical, (keen to know if anyone else uses gasless and how they get on?) my MIG does both so will get a regulator, flow meter and a gas bottle and I am sure I will achieve better results.
250buggys
Well-known member
As expected I had to enlarge the top two holes in the mud guard bracket, shouldn't be too much of a problem as I will just fit washers or a brace under the lock tab. I guess these were made in a jig originally for accuracy?
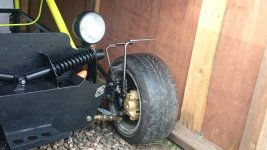
Off to the paint shop with nearside bracket, I wish I could weld much neater so I didn't have to grind it afterwards. I will settle for good strong welds for now and hopefully better looking welds will come later...
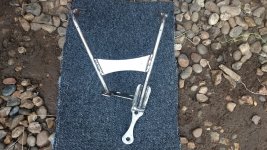
Will hopefully have a look at the off side bracket tomorrow if the rain holds off.
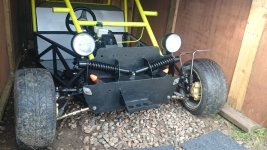
I was looking through my sheds and came across my buggy's head lamps.
Fitted these as I thought that they would be less prone to damage on the buggy. I have a lot more important jobs on the list and the lights will have to come off again as the lenses have misted a bit, (UV?) I will try and polish the glass in an attempt to sort this out, I mentioned this to Danny and he recommended tooth paste - I will try this as it will be cheaper for a tube of Colgate instead of a new pair of dominators which look really good on kit cars... unless he was pulling my pisser???
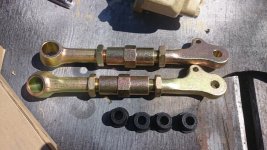
Also the new bump stops turned up, so fitted these.

Off to the paint shop with nearside bracket, I wish I could weld much neater so I didn't have to grind it afterwards. I will settle for good strong welds for now and hopefully better looking welds will come later...

Will hopefully have a look at the off side bracket tomorrow if the rain holds off.

I was looking through my sheds and came across my buggy's head lamps.
Fitted these as I thought that they would be less prone to damage on the buggy. I have a lot more important jobs on the list and the lights will have to come off again as the lenses have misted a bit, (UV?) I will try and polish the glass in an attempt to sort this out, I mentioned this to Danny and he recommended tooth paste - I will try this as it will be cheaper for a tube of Colgate instead of a new pair of dominators which look really good on kit cars... unless he was pulling my pisser???
Also the new bump stops turned up, so fitted these.
250buggys
Well-known member
Rain held off today and was quite nice, not like yesterday where I was dodging the showers (typical British summertime)
Got the welder out again and repaired the offside cycle wing mud guard bracket.
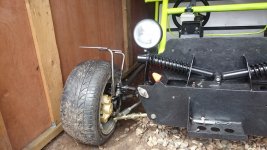
Fitted the brackets to the buggy, I got the fibreglass mud guards out of storage and placed them on for size.
A really strange thing has happened, I made a decent tidy job of filling the old mounting holes, faring and painting (you would have never known the old holes existed). When I got the mud guards out of the shed it was really obvious where the old holes were, the paint has crazed and TBH looks rubbish. I had to look at the previous pics just to double check I wasn't going crazy! I didn't take a pic as I was in self denial, but is evident on both front mud guards, will post a pic later on.
The only explanation I can come up with is the differences in thermal expansion between the filler and paint I applied in January and the original layup, also stored in a hot shed in late July. I hope the new mounting holes will hide this.
Need to get some more grey primer, had a little left so managed to get half a coat on yesterday evening.
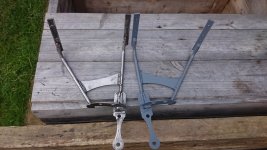
This is probably where Danny will post "I've got a decent spare set of mudguard brackets somewhere..."
Got the welder out again and repaired the offside cycle wing mud guard bracket.

Fitted the brackets to the buggy, I got the fibreglass mud guards out of storage and placed them on for size.
A really strange thing has happened, I made a decent tidy job of filling the old mounting holes, faring and painting (you would have never known the old holes existed). When I got the mud guards out of the shed it was really obvious where the old holes were, the paint has crazed and TBH looks rubbish. I had to look at the previous pics just to double check I wasn't going crazy! I didn't take a pic as I was in self denial, but is evident on both front mud guards, will post a pic later on.
The only explanation I can come up with is the differences in thermal expansion between the filler and paint I applied in January and the original layup, also stored in a hot shed in late July. I hope the new mounting holes will hide this.

Need to get some more grey primer, had a little left so managed to get half a coat on yesterday evening.

This is probably where Danny will post "I've got a decent spare set of mudguard brackets somewhere..."
250buggys
Well-known member
Just popped out to the shed to take a quick pic before it got too dark.
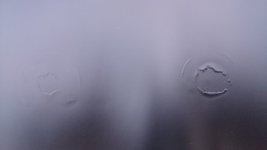
Here you can see the old mounting holes, really obvious and it's like this in both the front mudguards, all 8 holes. It was really mild in January when I filled these holes, no problem at all with the filler going off and paint drying.
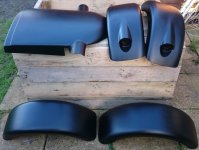
Just to prove I am not going insane, a couple of pics of the fibre glass panels, all looking as new... I spent ages restoring these as they had a pretty hard life.
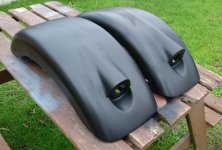
It's not the end of the world, I guess I will have to rub down and respray, but what a pain! I would rather be ticking off other jobs than re-visiting previous work that was looking 100% at the time of finish....... A step forwards with the mudguard brackets and a step backwards with the mudguards.

Here you can see the old mounting holes, really obvious and it's like this in both the front mudguards, all 8 holes. It was really mild in January when I filled these holes, no problem at all with the filler going off and paint drying.

Just to prove I am not going insane, a couple of pics of the fibre glass panels, all looking as new... I spent ages restoring these as they had a pretty hard life.

It's not the end of the world, I guess I will have to rub down and respray, but what a pain! I would rather be ticking off other jobs than re-visiting previous work that was looking 100% at the time of finish....... A step forwards with the mudguard brackets and a step backwards with the mudguards.
250buggys
Well-known member
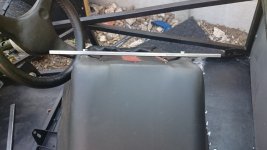
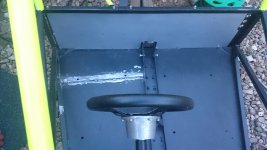
I spent a fair bit of time tinkering around fitting my seats. I knew it was going to be fairly difficult as I wanted to bolt the seats from underneath, this meant measuring the hole centres very accurately then drilling the floor panels and box section to suit.
I ordered some 10 x 25mm rectangle section.
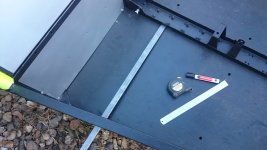
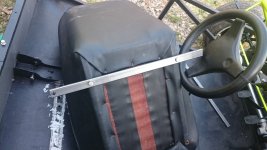
Seat in optimum position after much adjustment. I checked the steering position, pedals and wheel, all seems good.
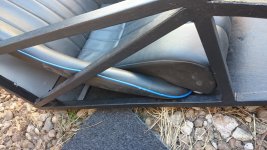
I tried the seat in place with 25 x 25 box section at the back and 10 x 25 at the front, this didn't feel right so I put the 10 x 25 front and back.
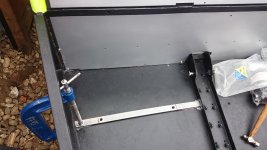
The holes line up and clamped in place, now ready to weld the rectangle section in place.
I ordered some 10 x 25mm rectangle section.

Seat in optimum position after much adjustment. I checked the steering position, pedals and wheel, all seems good.

I tried the seat in place with 25 x 25 box section at the back and 10 x 25 at the front, this didn't feel right so I put the 10 x 25 front and back.

The holes line up and clamped in place, now ready to weld the rectangle section in place.
250buggys
Well-known member
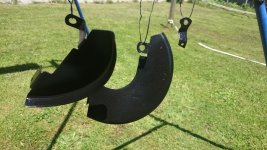
Also got some paint on the mud guard brackets.
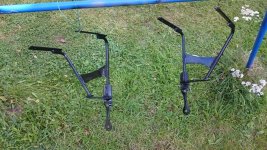
And fitted to buggy.
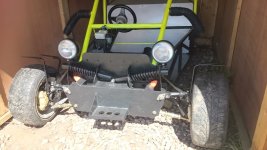
This pic looks silly, I have some gaitors to cover the wing mirror brackets. I haven't cut them down to suit yet but fitted them as when working on the buggy I keep loosing skin to these! also it will help to keep my oily prints off the paintwork.

And fitted to buggy.

This pic looks silly, I have some gaitors to cover the wing mirror brackets. I haven't cut them down to suit yet but fitted them as when working on the buggy I keep loosing skin to these! also it will help to keep my oily prints off the paintwork.
250buggys
Well-known member
250buggys
Well-known member
I wasn't that happy with the edge trim that I glued onto the firewall, some of the glue splodged out the side a bit and looked a bit tatty. Every time I looked at it, it really annoyed me (OCD a bit I know).
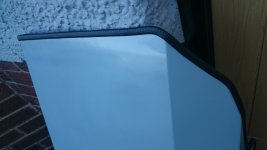
So I decided to get some of the edge trim with the steel insert and fit that instead. The edge trim with out the steel insert looks better as it doesn't have the pattern but it really wont grip very well.
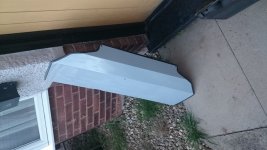
A much neater job.
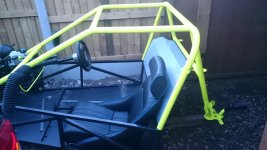
Firewall now refitted to the buggy and looking much better for it.

So I decided to get some of the edge trim with the steel insert and fit that instead. The edge trim with out the steel insert looks better as it doesn't have the pattern but it really wont grip very well.

A much neater job.

Firewall now refitted to the buggy and looking much better for it.
250buggys
Well-known member
Driver seat mounting section now fitted, all holes are in the right alignment and I am happy with the seat position. Just need to order some longer bolts and some form C washers, 100 x 100mm backing plates have been made up for each corner.
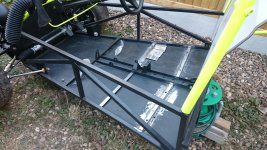
Still some work to do on the passenger side, I have fitted the rear section, just need to align, drill the holes and weld in the front mount.
Then paint the whole lot.

Still some work to do on the passenger side, I have fitted the rear section, just need to align, drill the holes and weld in the front mount.
Then paint the whole lot.
250buggys
Well-known member
Got some time on the buggy today,
The final seat mount was fitted, holes drilled and welded in.
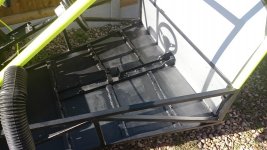
I had some Upol Raptor left so mixed that up and painted over the bare metal box section. Really good stuff for keeping the rust at bay, I will probably end up getting some more to paint the underside of the buggy.
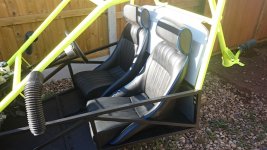
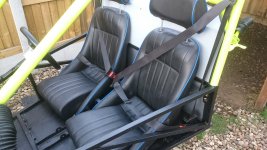
Seats are in and I am very happy with the driving position, plenty of leg room and the steering wheel is off my knees.
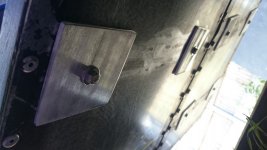
This is a picture of the underside of the buggy, it shows the 100 x 100mm backing plates I made to brace the seat bolts.
The final seat mount was fitted, holes drilled and welded in.

I had some Upol Raptor left so mixed that up and painted over the bare metal box section. Really good stuff for keeping the rust at bay, I will probably end up getting some more to paint the underside of the buggy.

Seats are in and I am very happy with the driving position, plenty of leg room and the steering wheel is off my knees.

This is a picture of the underside of the buggy, it shows the 100 x 100mm backing plates I made to brace the seat bolts.
250buggys
Well-known member
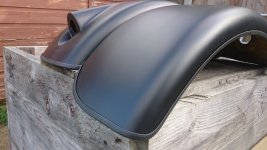
Today I dug out the front mud guards and fitted some edge trim.
Previously I had noticed that one of the air bleed screws was missing from the brake callipers, must have fallen out somewhere but I couldn't find it.
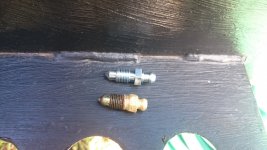
I ordered a pair of shiny new replacements but they are slightly different to the originals, they are slightly longer and the thread does not meet the flange where the spanner fits, also the spanner fitting is greater, if they are not right I will revisit this later, at least I still have one for comparison.
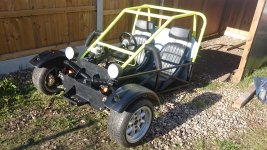
Mud guard holes drilled, just need to order some M6x20 dome heads to secure.

Previously I had noticed that one of the air bleed screws was missing from the brake callipers, must have fallen out somewhere but I couldn't find it.

I ordered a pair of shiny new replacements but they are slightly different to the originals, they are slightly longer and the thread does not meet the flange where the spanner fits, also the spanner fitting is greater, if they are not right I will revisit this later, at least I still have one for comparison.

Mud guard holes drilled, just need to order some M6x20 dome heads to secure.

